> ## Documentation Index
> Fetch the complete documentation index at: https://help.broadstripes.com/llms.txt
> Use this file to discover all available pages before exploring further.
# Your profile photo
> Upload, crop, and manage the photo that appears on your user avatar disc in Broadstripes.
Your **profile photo** is the picture that appears on your user avatar disc -- the circle in the top-right corner of the Broadstripes navigation bar. When you upload a photo it replaces your initials. Your photo will begin to appear in additional places throughout the app (such as on notes you add) during the second half of 2026. It is not shared or visible outside the app.
## Upload a profile photo
1. Click your avatar disc () in the top-right navigation bar to open the user menu.
2. Select **User settings**.
3. Scroll to the **Profile photo** section.
4. Click the upload tile labeled **Upload a photo**, or drag an image file directly onto it.
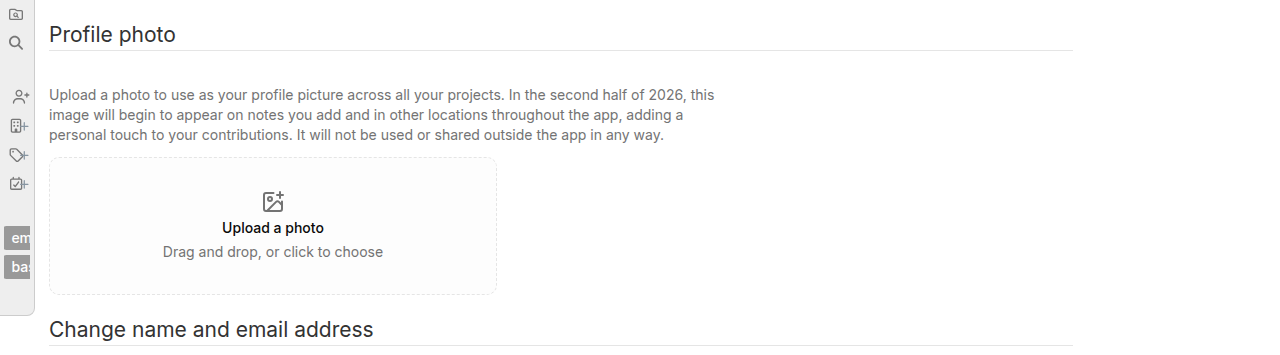 Supported file types: JPEG, PNG, WebP, and HEIC/HEIF (iOS camera photos). Files must be image files; other file types are rejected with an error message.
## Crop and save your photo
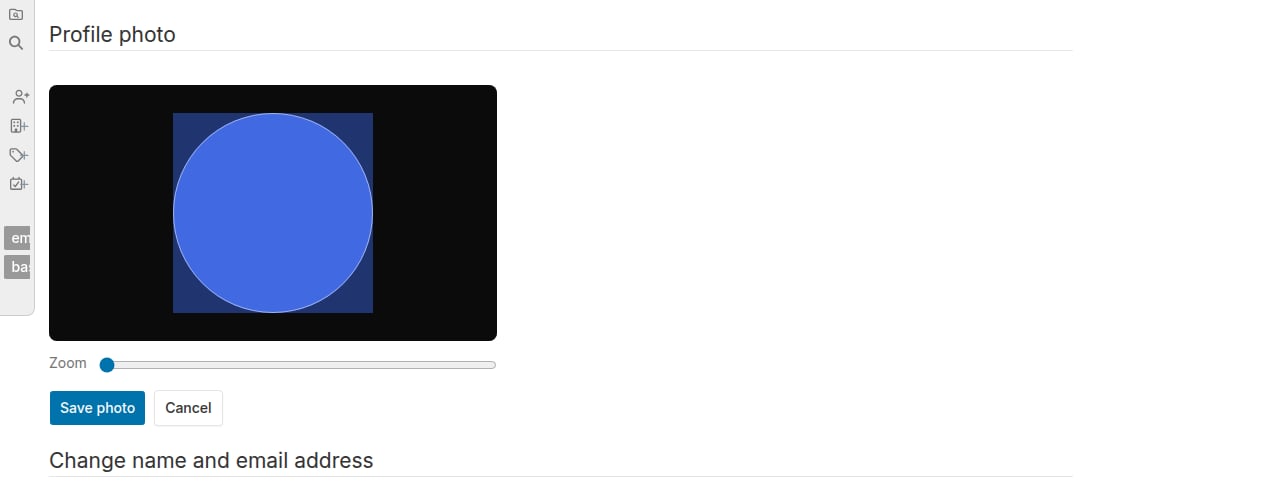
After you select or drop an image, a crop editor opens with a circular preview.
* **Pan**: drag the image to reposition it inside the circle.
* **Zoom**: drag the **Zoom** slider to zoom in or out.
When the framing looks right, click **Save photo**. Your disc updates immediately -- no page reload needed.
Click **Cancel** to go back without saving.
Supported file types: JPEG, PNG, WebP, and HEIC/HEIF (iOS camera photos). Files must be image files; other file types are rejected with an error message.
## Crop and save your photo
After you select or drop an image, a crop editor opens with a circular preview.
* **Pan**: drag the image to reposition it inside the circle.
* **Zoom**: drag the **Zoom** slider to zoom in or out.
When the framing looks right, click **Save photo**. Your disc updates immediately -- no page reload needed.
Click **Cancel** to go back without saving.
 ## Replace or remove your photo
Once you have a photo, two buttons appear next to your photo preview:
* **Replace photo** () -- opens the crop editor so you can select and crop a new image.
* **Remove photo** () -- shows a confirmation dialog. Click **Remove photo** to confirm, or **Keep photo** to cancel. Removing your photo reverts your disc to showing your initials.
## Your disc color and your role
The color of your avatar disc reflects your highest permission tier in the current project:
| Role | Disc color |
| --------------------------------- | ---------- |
| Super admin | Amber |
| Union admin (project group admin) | Green |
| Project admin | Rose |
| Basic user | Sky blue |
When you have an uploaded photo, your tier color appears as a thin ring border around the photo. When you are showing initials, the entire disc is filled with the tier color and your initials appear in white.
## Admin: remove a user's profile photo
Super-admins can view and remove any user's current profile photo from the admin user edit page. After removal the user reverts to showing their initials. Admins cannot upload or crop a photo on behalf of a user -- users must do that themselves from their own settings page.
## Replace or remove your photo
Once you have a photo, two buttons appear next to your photo preview:
* **Replace photo** () -- opens the crop editor so you can select and crop a new image.
* **Remove photo** () -- shows a confirmation dialog. Click **Remove photo** to confirm, or **Keep photo** to cancel. Removing your photo reverts your disc to showing your initials.
## Your disc color and your role
The color of your avatar disc reflects your highest permission tier in the current project:
| Role | Disc color |
| --------------------------------- | ---------- |
| Super admin | Amber |
| Union admin (project group admin) | Green |
| Project admin | Rose |
| Basic user | Sky blue |
When you have an uploaded photo, your tier color appears as a thin ring border around the photo. When you are showing initials, the entire disc is filled with the tier color and your initials appear in white.
## Admin: remove a user's profile photo
Super-admins can view and remove any user's current profile photo from the admin user edit page. After removal the user reverts to showing their initials. Admins cannot upload or crop a photo on behalf of a user -- users must do that themselves from their own settings page.