> ## Documentation Index
> Fetch the complete documentation index at: https://help.broadstripes.com/llms.txt
> Use this file to discover all available pages before exploring further.
# Project members
See details about your **members** – the users who have been invited to have a role in your project.
## View your project's users
1. To get started, you can access **Members settings** in one of two ways:\
Click the gear icon in the upper right corner of any page, then select **Members**.
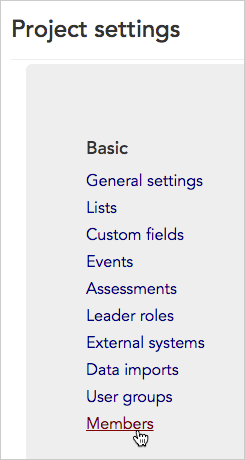
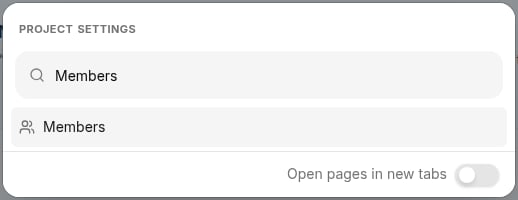 Or, from the **Project settings page**, click the **Basic > Members** link.
 2. The **Members index page** will open, showing all of the people who have been invited to be part of your Broadstripes project.
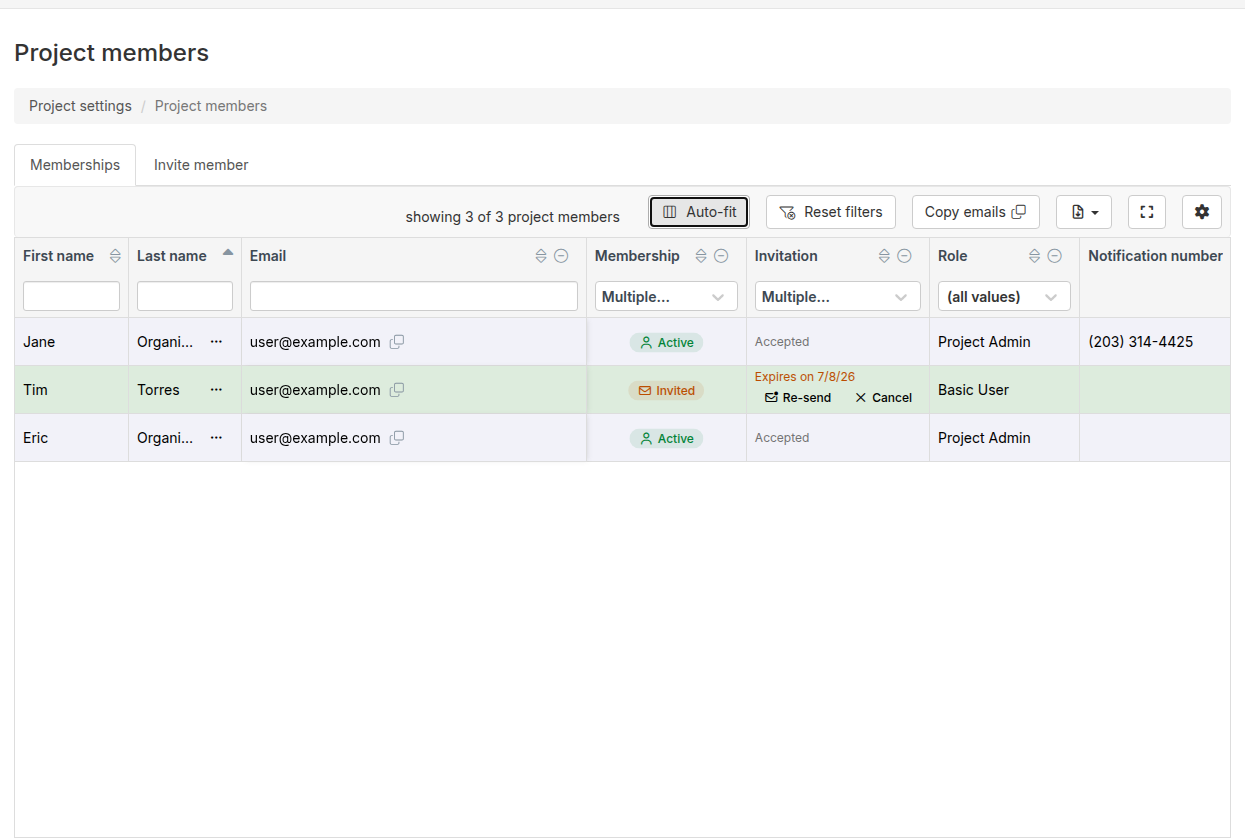 3. From the index page, you can see a range of information about each member (or invited member):
* **Name**, **Email address**, and **Role** of the member (see the [Edit user](/docs/start-project/user-and-membership-overview/) section of the Users and Membership article for more details on specific roles).
* **Visibility (optional)** – this column is only shown if you have enabled the "Limited visibility" feature in your project. If Limited visibility is enabled, this column lists the shops and departments you've assigned (or made "visible") to each member (see the [Limited visibility article](/docs/project-settings/limited-visibility/) for more information about enabling and configuring this feature)
* **Temporary vis. (past 2 wks)** **(optional)** – this column is only shown if you have enabled both the "Limited visibility" and "Temporary visibility" features in your project. If these are enabled, this column lists the people this member has requested to view temporarily in the past two weeks (see the [temporary visibility article](/docs/project-settings/temporary-visibility/) for more information about enabling this feature and how it works)
* **Invited By** – the name of the user who invited the member to join the project
* **Created At** – the date they were invited
* **Permissions** – the specific permissions the member was granted
* **edit permissions** – you can change a project member's permissions by clicking the **edit permissions** link (see the [Edit user permissions](/docs/start-project/user-and-membership-overview/) section of the Users and Membership article for more details on setting permissions).
* **Membership** – the status of the member, shown as a badge:
* **Active** – the member has accepted their invitation and has an active account.
* **Invited** – the member has been sent an invitation but has not yet accepted it. This badge also appears when the invitation has expired and a new one needs to be sent.
* **Deactivated** – the member's access has been removed.
* **Invitation** – shown in the Actions column next to each invited member, this area displays invitation-related controls and status:
* **Expires on \[date]** – shown in amber for members whose invitation is still pending, so you know when the link will stop working.
* **Expired** – shown in red when the invitation link has passed its expiry date. You can re-send a fresh invitation to the member.
* **Accepted** – shown in gray for members who have already accepted their invitation.
* **Re-send** – click this button to send a new invitation email to a pending or expired member. A fresh invitation link replaces the old one.
* **Cancel** – click this button to cancel a pending or expired invitation and remove the member from the project.
* **Member actions menu** – click the ellipsis icon at the end of any member row to open a dropdown menu with all actions available for that member: Deactivate, Reactivate, Re-send invitation, Cancel invitation, Break link to person, and Edit permissions.
## Invite new users
You can invite new people to join your project by clicking on the **Invite member tab**.
3. From the index page, you can see a range of information about each member (or invited member):
* **Name**, **Email address**, and **Role** of the member (see the [Edit user](/docs/start-project/user-and-membership-overview/) section of the Users and Membership article for more details on specific roles).
* **Visibility (optional)** – this column is only shown if you have enabled the "Limited visibility" feature in your project. If Limited visibility is enabled, this column lists the shops and departments you've assigned (or made "visible") to each member (see the [Limited visibility article](/docs/project-settings/limited-visibility/) for more information about enabling and configuring this feature)
* **Temporary vis. (past 2 wks)** **(optional)** – this column is only shown if you have enabled both the "Limited visibility" and "Temporary visibility" features in your project. If these are enabled, this column lists the people this member has requested to view temporarily in the past two weeks (see the [temporary visibility article](/docs/project-settings/temporary-visibility/) for more information about enabling this feature and how it works)
* **Invited By** – the name of the user who invited the member to join the project
* **Created At** – the date they were invited
* **Permissions** – the specific permissions the member was granted
* **edit permissions** – you can change a project member's permissions by clicking the **edit permissions** link (see the [Edit user permissions](/docs/start-project/user-and-membership-overview/) section of the Users and Membership article for more details on setting permissions).
* **Membership** – the status of the member, shown as a badge:
* **Active** – the member has accepted their invitation and has an active account.
* **Invited** – the member has been sent an invitation but has not yet accepted it. This badge also appears when the invitation has expired and a new one needs to be sent.
* **Deactivated** – the member's access has been removed.
* **Invitation** – shown in the Actions column next to each invited member, this area displays invitation-related controls and status:
* **Expires on \[date]** – shown in amber for members whose invitation is still pending, so you know when the link will stop working.
* **Expired** – shown in red when the invitation link has passed its expiry date. You can re-send a fresh invitation to the member.
* **Accepted** – shown in gray for members who have already accepted their invitation.
* **Re-send** – click this button to send a new invitation email to a pending or expired member. A fresh invitation link replaces the old one.
* **Cancel** – click this button to cancel a pending or expired invitation and remove the member from the project.
* **Member actions menu** – click the ellipsis icon at the end of any member row to open a dropdown menu with all actions available for that member: Deactivate, Reactivate, Re-send invitation, Cancel invitation, Break link to person, and Edit permissions.
## Invite new users
You can invite new people to join your project by clicking on the **Invite member tab**.
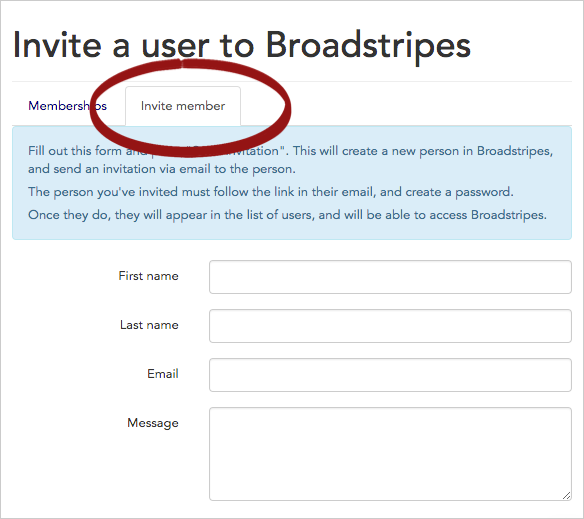 See the [Add and invite a new user](/docs/start-project/user-and-membership-overview/)section of the Users and Membership article for step-by-step instructions on adding new members to your project.