

Overview
Broadstripes enables you to automate report generation either once at a future date or on specified recurring schedules. You can set reports to run daily (including business days only), weekly, or monthly. Moreover, these reports can be automatically emailed to your team members. This guide will provide step-by-step instructions on scheduling status reports and search results reports in Broadstripes.Scheduling a Status report (admins only)
To schedule a status report, you must first navigate to the edit page for the report.- Click the Project settings icon in the upper right corner of any page (or press Ctrl-K / ⌘K). This opens a searchable list of settings.
-
Select Status report definitions (listed under Reports), or start typing to filter the list. This action will direct you to the page displaying the status report definitions for your project.

-
Find the status report you want to schedule, click the (actions) button in its Name column, and select Schedule. (If you don’t have a report to schedule, you will need to create one first.)

-
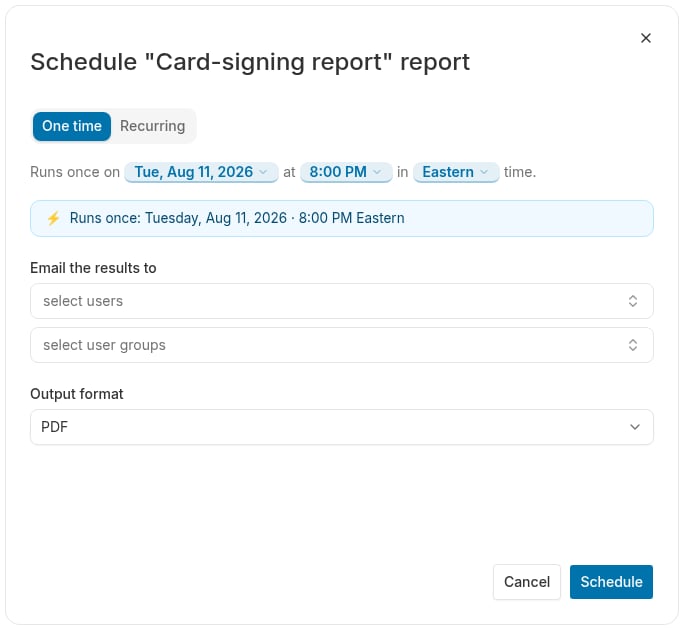
A scheduling dialog will appear, with the options split across two tabs: One time and Recurring.
- For a one-time report scheduled in the future, stay on the One time tab. It reads “Runs once on date at time in zone time.” Click any highlighted token in that sentence to choose the date, time, or time zone for report generation. A preview line shows when the report will run, or a warning if the selected time is in the past.
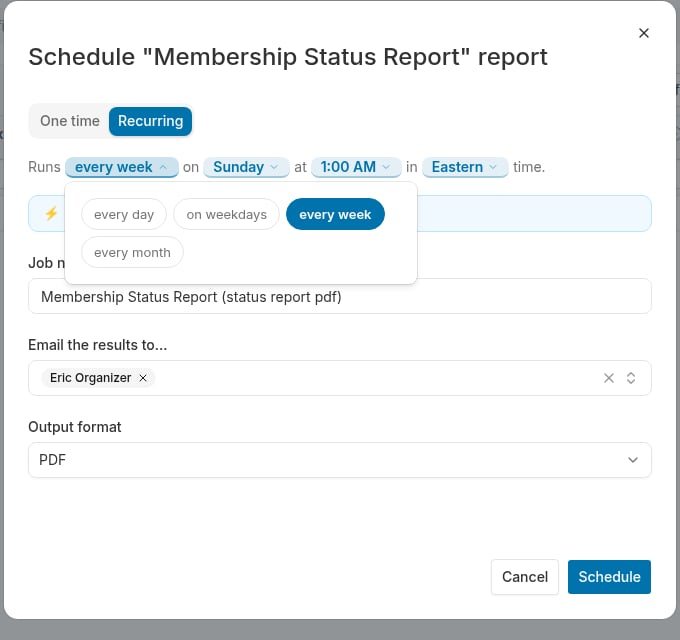
- To set up a recurring report, click the Recurring tab. It reads “Runs every week on Monday at time in zone time.” Click the frequency token to specify how often the report should run: every day, on weekdays, every week, or every month. You will also be asked for a Job name, which you’ll use for reference on the Scheduled Jobs page. The field starts with a suggested name built from the report name and the output format you select; you can type over the suggestion at any time, and the suggestion updates automatically if you change the output format before you type.
- For a one-time report scheduled in the future, stay on the One time tab. It reads “Runs once on date at time in zone time.” Click any highlighted token in that sentence to choose the date, time, or time zone for report generation. A preview line shows when the report will run, or a warning if the selected time is in the past.
Automatically email a scheduled status report
- Once the generation frequency is set, choose the Output format for the generated report: PDF or Spreadsheet (XLSX).
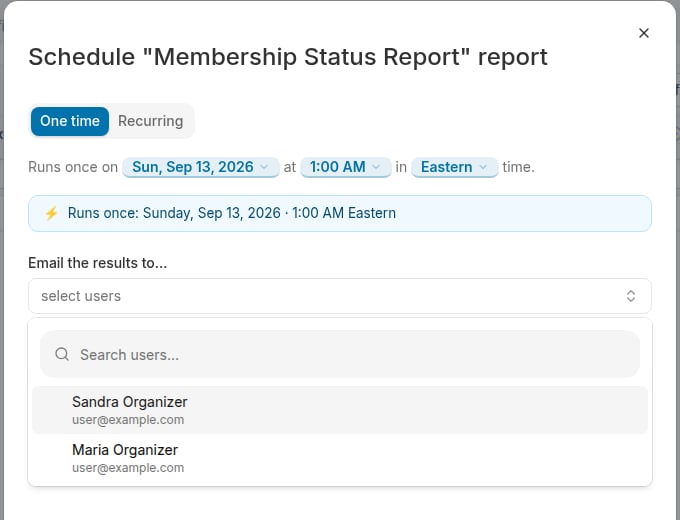
- Optionally, select recipients to receive the report by email. Your own account is pre-selected by default, so you receive the report without having to add yourself. Project admins see two search boxes — one for individual users and one for user groups. Type a name or email address to filter the list, then click a name to add them. Selected recipients appear as removable chips; you can remove yourself from the list if you do not want to receive the report. Non-admin users see an Email the results to myself checkbox, which starts checked.
- Save your selections. You can view your scheduled report job by accessing the Scheduled Jobs page in the left navigation panel.
Scheduling a Search results report
Search results reports may be scheduled for one-time generation at a future time or recurring generation. A one-time report uses static search results set during scheduling. Recurring reports are dynamic and fetch search results at the time of report generation. Search results list reports can also be scheduled to run and be emailed to you and other users. Here’s how:- Run your desired search and select the contacts you want to download.
-
Go to the Reports dropdown menu.
 You may schedule a PDF report, spreadsheet report.
- When you select the type of report you want to generate, a pop-up box will appear with your report options.
-
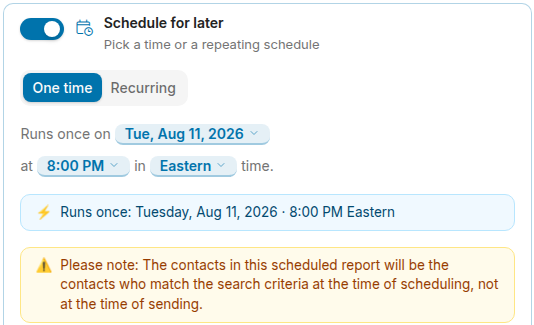
Turn on the Schedule for later switch (“Pick a time or a repeating schedule”) at the bottom of the pop-up.
 Turning on Schedule for later makes the scheduling options appear, and the dialog’s Generate button becomes a Schedule button.
-
Choose the desired schedule for generation.
- For a one-time report scheduled in the future, stay on the One time tab. It reads “Runs once on date at time in zone time.” Click any highlighted token in that sentence to choose the date, time, or time zone for report generation. A preview line shows when the report will run.
- To set up a recurring report, click the Recurring tab. Click the frequency token to specify how often the report should run: every day, on weekdays, every week, or every month. You will also be asked for a Job name, which you’ll use for reference on the Scheduled Jobs page. The field starts with a suggested name built from the file name and output format; you can type over the suggestion at any time. (The Recurring tab is available only if you selected all of your search results rather than hand-picking contacts.)
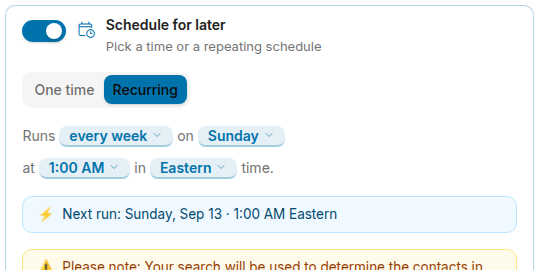
- For a one-time report scheduled in the future, stay on the One time tab. It reads “Runs once on date at time in zone time.” Click any highlighted token in that sentence to choose the date, time, or time zone for report generation. A preview line shows when the report will run.
Automatically email a scheduled search results report
- Optionally, select recipients to receive the report by email. Your own account is pre-selected by default, so you receive the report without having to add yourself. Project admins see two search boxes — one for individual users and one for user groups. Type a name or email address to filter the list, then click a name to add them. Selected recipients appear as removable chips; you can remove yourself from the list if you do not want to receive the report. Non-admin users see an “Email the results to myself” checkbox, which starts checked.
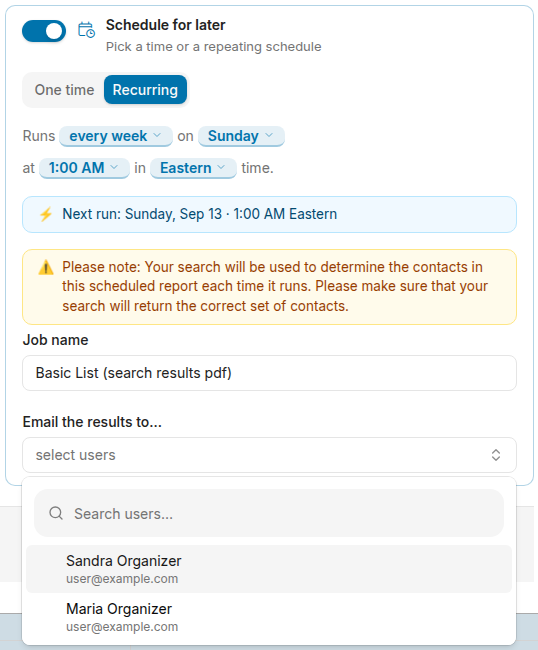
- Click the Schedule button to enable your scheduled report.

Editing a scheduled job
You can change the name, schedule, and (for report jobs) recipients of any scheduled job you created. Project admins can edit any job in the project.- Access the Scheduled Jobs link in the left navigation panel.
- In the row for the job you want to change, click the (actions) button in the Name column.
- Select Edit from the menu. (Edit is grayed out if the job is currently running.)
- In the dialog that opens, update any of the following:
- Name — the label shown on the Scheduled Jobs page.
- Schedule — each highlighted chip in the schedule sentence is clickable. Click a chip to open a picker with additional options — for example, clicking the frequency chip lets you choose between every day, on weekdays, every week, or every month. Switch between One time and Recurring using the tabs at the top. A preview line below the sentence shows the next scheduled run (or a warning if the one-time date is in the past).
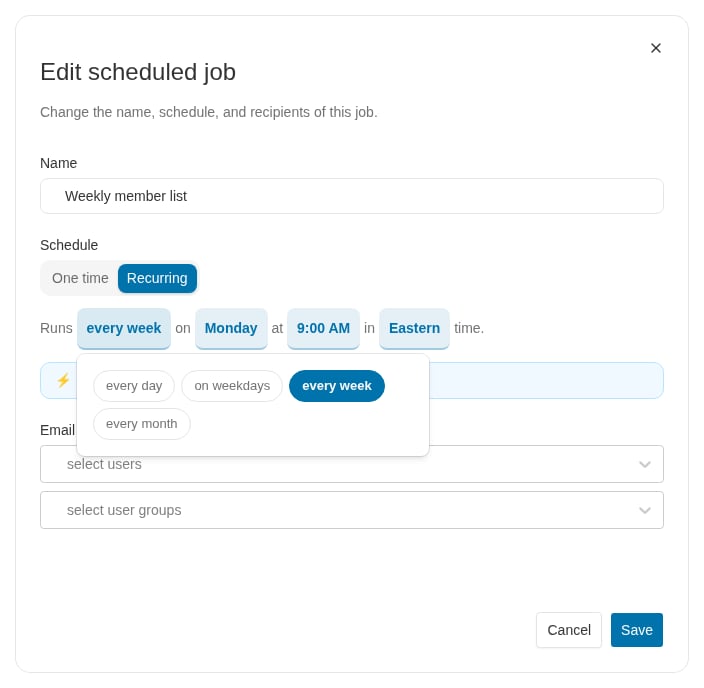
- Recipients (shown only for report jobs that support email delivery) — project admins see pickers for individual users and user groups; non-admins see an “Email the results to myself” checkbox.
- Click Save to apply your changes.
Canceling a scheduled report
To cancel a scheduled report:- Access the Scheduled Jobs link located in the left navigation panel.
- In the row for the job you want to cancel, click the (actions) button in the Name column.
- Select Delete from the menu. A confirmation dialog will appear.
- Click Delete to confirm. The schedule is permanently removed and the report will no longer run.
Undeliverable recipient addresses
If a recipient’s email address becomes undeliverable — because the address is misspelled, no longer exists, or is being rejected by the mail server — Broadstripes detects this and warns you on the Scheduled Jobs page. An amber warning icon appears next to the name of any scheduled report that has one or more undeliverable recipient addresses. The icon’s tooltip names the affected address or addresses (for project admins) or describes the problem in general terms (for non-admins). To see full details and take action, open the job’s edit dialog:- In the Scheduled Jobs page, click the button in the row for the affected job.
- Select Edit.
- A warning alert appears inside the dialog listing the undeliverable address or addresses and guidance on what to do.
Resolving the problem
To stop the bouncing, do one of the following in the edit dialog:- Correct the address: In the Recipients section, remove the affected user and re-add them with a corrected email address (after updating the address on their user account).
- Remove the recipient: Remove the user from the recipients list entirely so they no longer receive the report by email.
- Re-enable delivery (project admins only): If you believe the mailbox issue has been resolved — for example, the recipient’s inbox was full but has been cleared — click Re-enable delivery next to the address. Broadstripes will attempt to deliver to that address again. You can re-enable delivery up to a limited number of times per address.
Group admins can re-enable delivery past the standard retry limit when needed.