

Overview
Events are a special kind of custom field in Broadstripes. Each event can be created to contain one or more “steps” (checkboxes) to capture particular actions in the workflow of a given campaign activity. Here are some examples of when to use events:- Tracking petition signatures
- Tracking invitations, RSVPs, and attendance for a meeting or rally
- Recording whether someone has signed a membership card
How do events work?
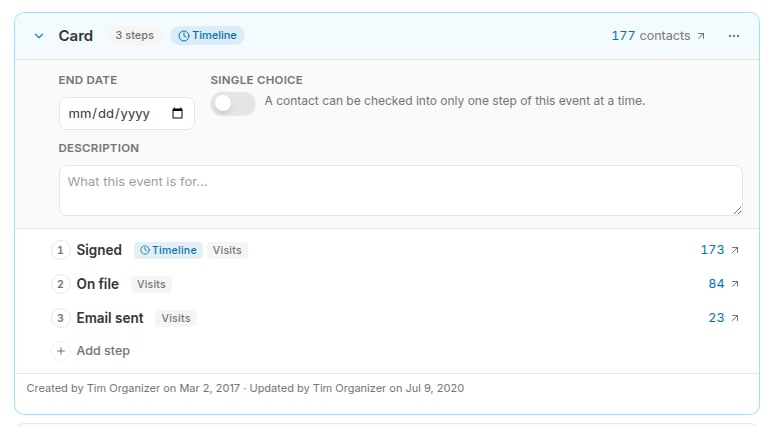
As you probably know, labor organizing involves answering lots of yes/no questions about the workers in the bargaining unit. For example, imagine that you’re working on an external organizing card-signing drive. For each worker, you’d want to know:- Have they signed a card?
- Do we have their signature on file?
- Did we email them a copy of their card?
When do you use events?
Typically, events are used to capture things that are transient: important now, but possibly less so in the future. You can use events to record and track literal organized events, but you can also use events to keep track of important one-time information or occurrences. As a rule of thumb, you should use an event to record information that occurred at a certain time, whereas you’ll use built-in fields (fields that come standard in all Broadstripes projects) or custom fields (special fields created by your admin) to record information that is always true. With most card-signing campaigns, once the election is won, that data will fade into history in the minds of the organizers, and new questions will become important. In these cases, events that are no longer relevant to your work can be made inactive to keep them from cluttering the project.Getting started with events
The rest of this article was designed to help users understand the basics of Broadstripes’ events:- how to view events on a contact’s record
- how to create a simple single-step event (for example, to track who will attend a committee meeting)
- how to search by event-related data
- More: check out the creating an event article in our Admin Guide to learn how to create a multi-step event as well as deactivate, edit, or delete an event.
Viewing events
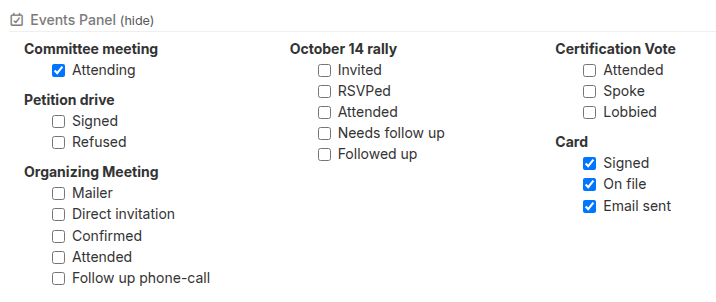
Once you’ve set up an event, that event and all its steps will be visible and can be edited by your users from the contact record’s Events Panel on their Overview tab. The panel lists every active event in your project, with a checkbox for each of its steps.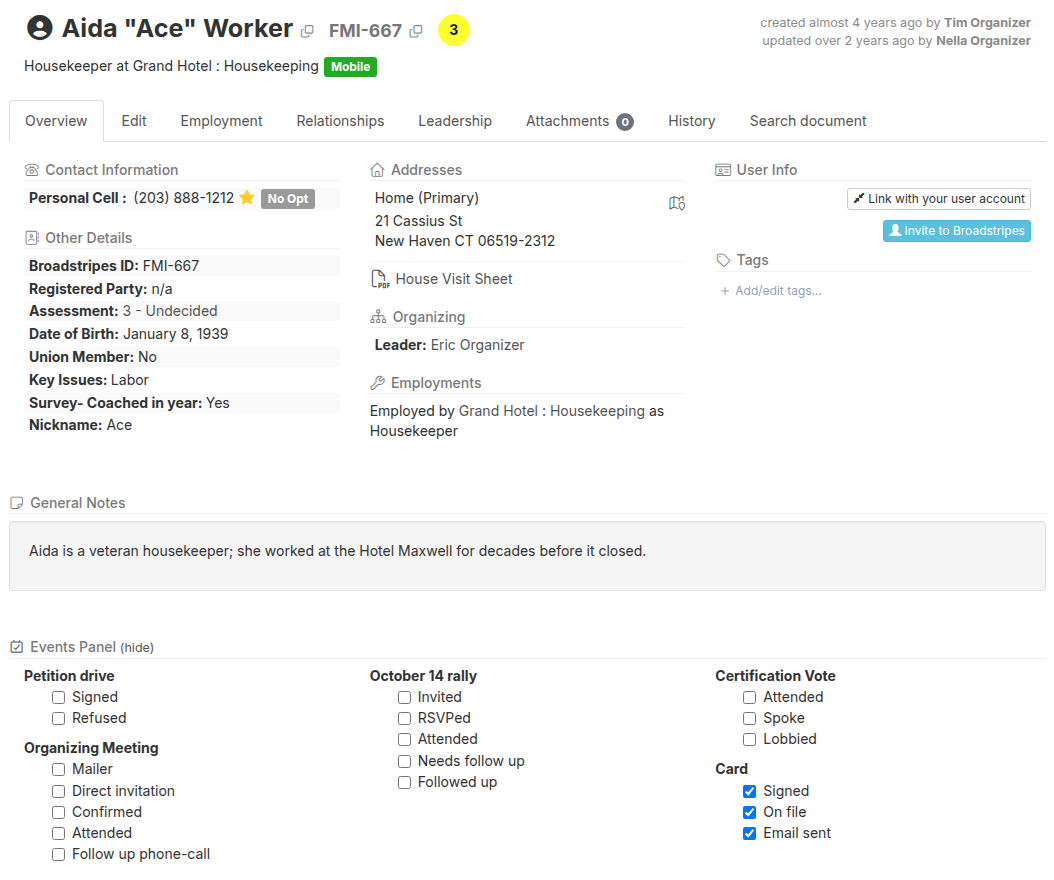
Understanding check-offs and steps
Each event can be created to contain one or more “steps” (checkboxes) to capture particular actions in the workflow of a given campaign activity. You have quite a bit of freedom in Broadstripes to format events in the most useful way for your project. Depending on what information you are looking to capture, you may want to create a single check-off event or a multi-step event. Single check-off events allow you to customize a simple yes/no checkbox for each contact in your project. They are best used when you need to capture only the most basic information about an event: for example, whether a worker is attending a meeting or not. This Events Panel (located on a contact record’s Overview tab) shows a single check-off event called “Committee meeting” with a single event step called “Attending”.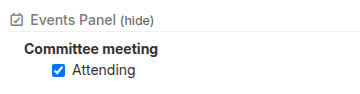
This Events Panel shows a single check-off event called Committee meeting.
- To closely track organizers’ turnout: for instance, when promoting a meeting, steps called Mailer, Direct invitation, Confirmed, Attended, and Follow up give you a more precise picture of what organizers’ efforts looked like than a single Attended check-off would.
- For events that have several options: for instance, a petition drive might have the steps Signed and Refused so organizers know whether someone was contacted, even if they didn’t end up signing.
- To record attendance to an event for several different dates: for instance, instead of a single Attending check-off, the Committee meeting event could have three steps labeled 3/1, 3/8, and 3/15.
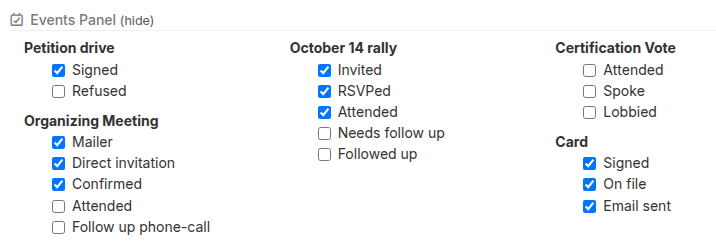
This Events Panel shows events with multiple 'steps' (checkboxes).
How to create a single check-off event
For this example, we will track whether a group of workers is attending a committee meeting with the simplest method possible – the single check-off. (Read more about creating multiple-step events in the creating an event article.)-
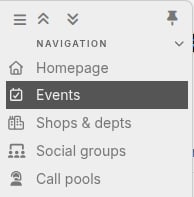
Get started by clicking Events () in the left sidebar. If the sidebar is collapsed, hover over it to see the labels.
-
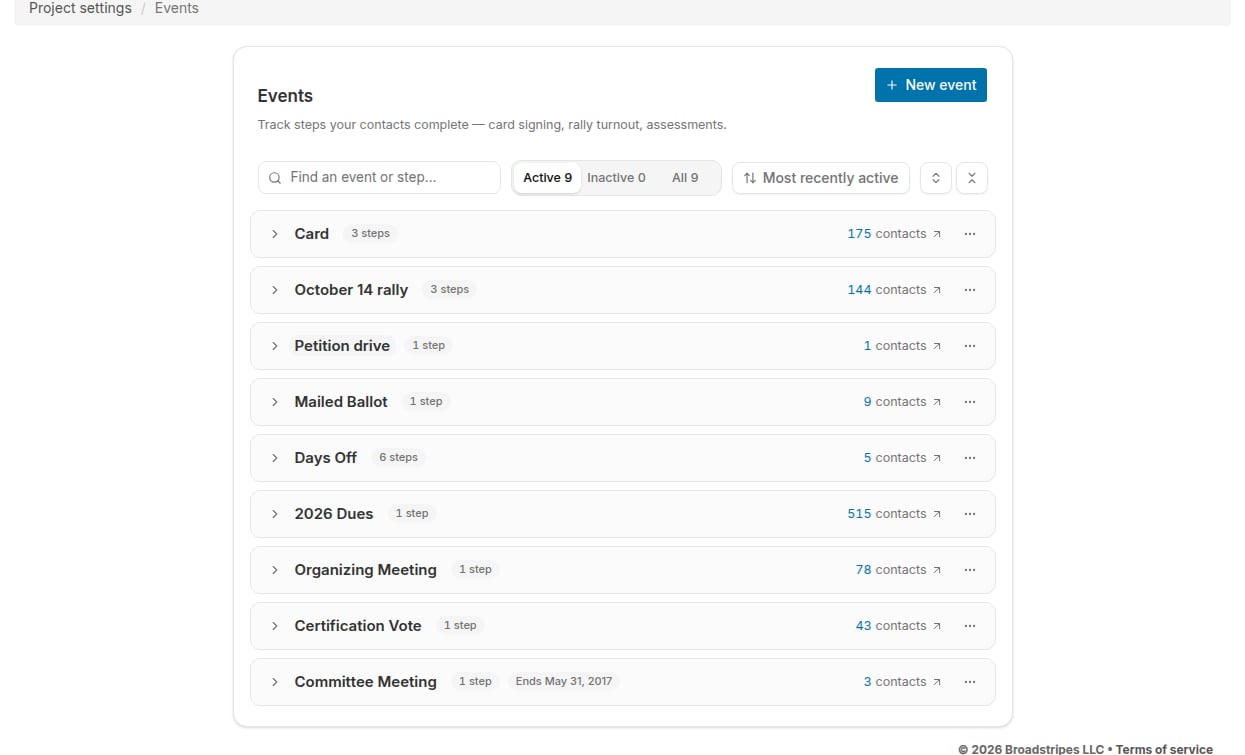
That will take you to your project’s Events page, which lists the active events in the project.
-
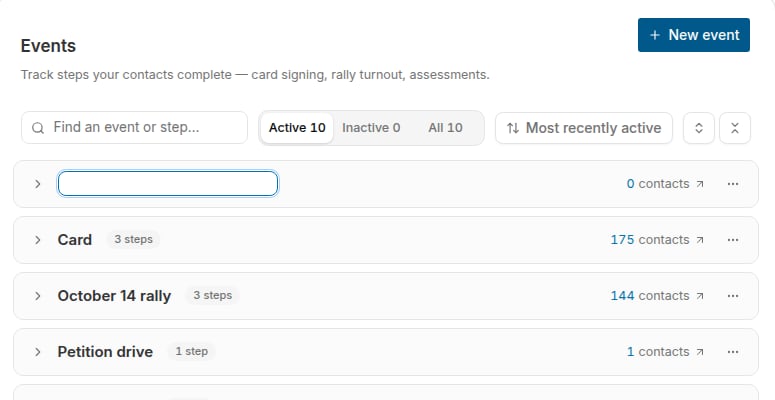
Click the + New event button in the upper-right corner of the page. A new event entry row will appear at the top of the list.
-
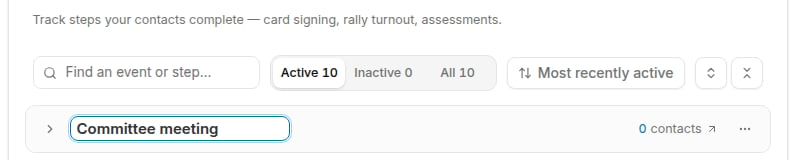
In the box, type “Committee meeting” and press Enter (or click away) to save the new event.
-
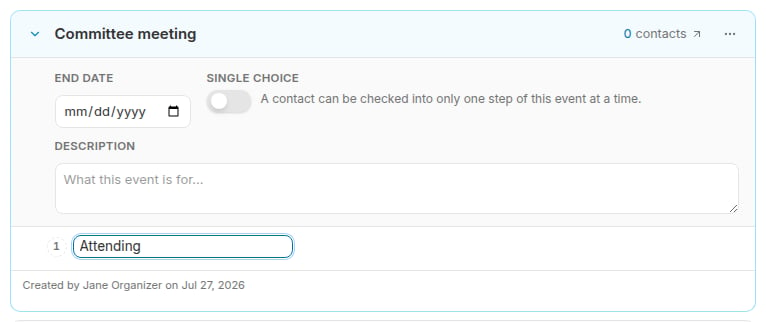
Next, create a single step under this new event. A blank step field appears below “Committee meeting” – type “Attending” to name the event’s single step.
-
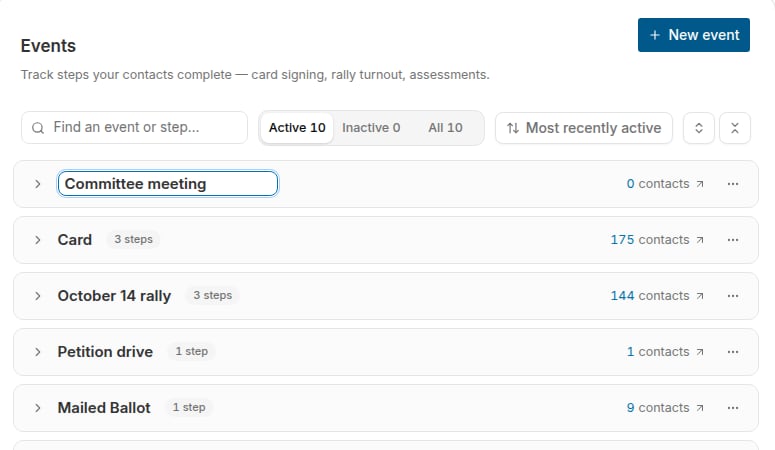
That’s it – the event and its steps are saved as you go, so there’s no separate Save button to click. Your new event now appears at the top of the events list.
Events can have multiple check-offs
If you want multiple checkboxes for a single event – for instance “Invited,” “Attended,” and “Followed up” – that’s no problem. Just expand the event card and click Add step at the bottom of its step list. Create a new step for each checkbox you want to see. Learn more in the creating an event article.”Single choice” and “Timeline tracked” settings
After creating an event, you can turn on “Single choice” for the event as a whole, and “Timeline tracked” for individual steps within it.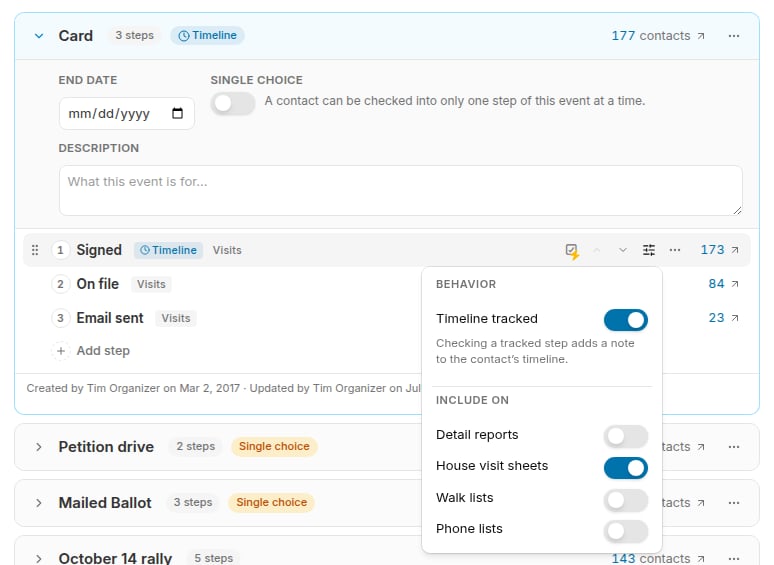
View and update a contact’s event data
Now that the event is set up, it’s ready for users to record their data. For this example, we’ll open Aida Worker’s record and check the Committee meeting checkbox to show she’s attending the meeting.- First, we’ll search for Aida’s record using the Find people card on the homepage.
-
We’ll click on her name in the search results to open her record.
-
On the Overview tab of Aida’s record, we’ll scroll down to the Events Panel and click the checkbox to show she’s attending the committee meeting.
Update many records at once
If you plan to update multiple records at once, Broadstripes gives you a few ways to do it without opening each record:- Quick check-off – check off the same step for a long list of people by typing their names one after another. See the quick check-off article.
- Bulk action – select contacts in your search results, then use the Check/uncheck event steps action to update all of them at once. See the check/uncheck event steps article.
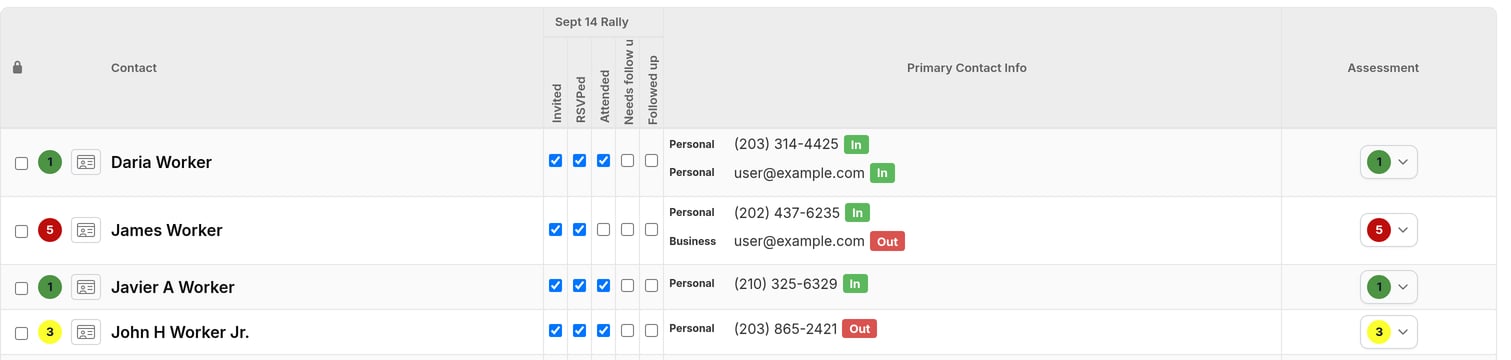
- Customized layouts – choose exactly which fields are displayed in your search results, including a checkbox column for each step of an event. This lets organizers check off steps for multiple workers all from a single data entry screen.
View key event data with a search
You’ve created your event and users are updating records with event data. Now you may be wondering how to see event-related information – for instance, a list of all the people attending the upcoming committee meeting. With Broadstripes, accessing this information is simple. In the search bar at the top of any page, type the name of your event, an equals sign, and the name of the step, then press Enter. Leave out any spaces within the two names (capitalization doesn’t matter). For our example, that’s “CommitteeMeeting=attending”. A list of all the people you have marked “Attending” will appear in your search results.

Learn more
Want to learn more about working with events, like how to create a multi-step event or how to deactivate, edit, or delete an event?- Check out the creating an event article in our Admin Guide.
- To check off a step for many people quickly, see the quick check-off article.
- To find people by the event steps on their records, see the search by event-related info article.