

- If you’re an admin for your project (and you must be an admin to run a data import), in the top-right corner of your page you’ll see a drop-down link labeled Settings.
- Click Settings > Data Imports.
- This takes you to the data imports index page, which lists any data imports already run in the project.
- Create a new data import by clicking the + Import Data button.
- If you want, type a name for the import.
Should I name the import?Naming an import is optional, but it allows you to provide a description that can jog your memory (for instance, “All Workers with Employments”).
Unnamed imports will be given the name of the import file (for example, “contact_list_01.csv”).
Unnamed imports will be given the name of the import file (for example, “contact_list_01.csv”).
- Click Choose file to locate your spreadsheet on your computer and upload it to Broadstripes.
Map your columns
- Once you’ve uploaded your spreadsheet, Broadstripes will process it for a moment (time depending on file size), and open the Data mapping panel.
What is mapping?“Mapping” means that the data in a spreadsheet column will be transferred into a selected field in Broadstripes – during the mapping process, Broadstripes is learning which fields in your spreadsheet relate to fields in Broadstripes.
- In the panel below, you’ll see that Broadstripes has recognized some of your spreadsheet columns and automatically “mapped” them to the appropriate fields. Automatic mapping is based on the name of the column (the text in the first row of the spreadsheet).
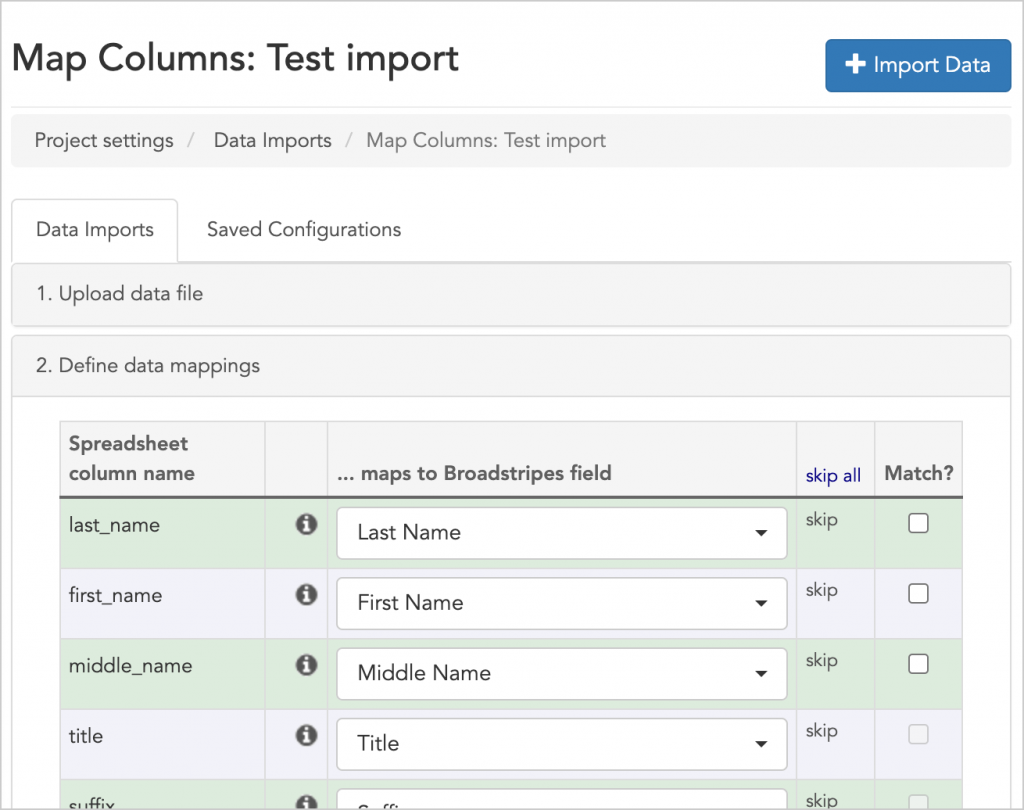
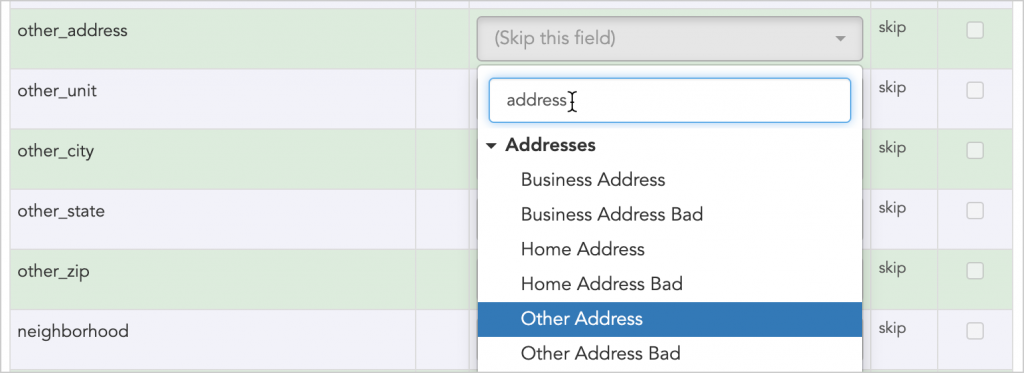
- With the Data mappings panel open, you can correct any mappings Broadstripes got wrong, and link any columns that weren’t mapped automatically. Use the filter to focus your search (e.g. typing “address” will show only address-related Broadstripes fields).
Manually map any fields that haven't been automatically mapped using the drop-down list.
Some things to keep in mind when mapping your columns:
- Columns with employment information need to be mapped to the corresponding turf level fields to create a turf structure.
- Clicking the info icon that appears next to a spreadsheet column name will open a pop-up box that lists the unique values for that column along with a count of their frequency. This info can be useful for ensuring that your data is clean and properly mapped.

Click the info icon to preview the actual data you are importing.
- Any rows marked “(Skip this field)” will need to be manually mapped by you. If you don’t want that data brought in, you can leave “(Skip this field)” as the selection for that column.
- We’re going to ignore the “Match?” column for now. This is covered in a separate article about updating data via import.
- Once you’ve mapped (or skipped) all the columns in your spreadsheet using the mapping panel, scroll down the page to the Configuration panel.
Configuration options
The Configuration panel offers you some choices about how Broadstripes should handle your imported data. Depending on how you’ve mapped your data in the previous step, you may see different options in the panel.Employments
- Choose how you would like Broadstripes to handle Employments.
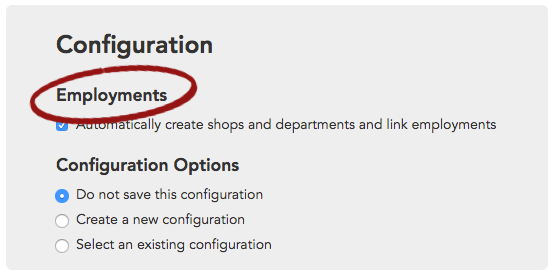
- Check Automatically create shops and departments and link employments if your import file includes workers and information about their employments (job positions). This creates a new turf tree structure and automatically places employees in that structure during import.
Example: Automatically create shops and departments…
I’m importing workers and their employments for the first time, so I want Broadstripes to automatically set up the turf structure. I’ll check Automatically create shops and departments and link employments.Preview and Import
- After configuring your options, click Preview Import to see what will happen before you commit to the import.
- Review the preview results carefully, paying attention to any errors or warnings.
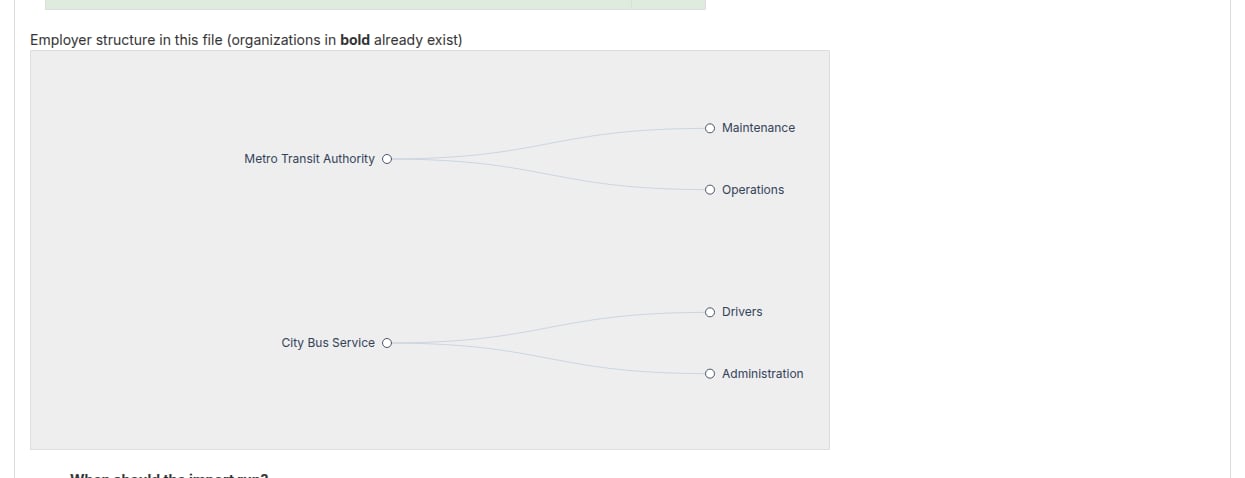
- If you checked Automatically create shops and departments and link employments, a department hierarchy tree appears below the preview results showing how the shop structure will be built. Organizations that already exist in the project appear in bold, so you can tell at a glance which organizations will be newly created versus updated.
- If everything looks correct, click Run Import to complete the process.
Hierarchy preview treeIf you checked Automatically create shops and departments and link employments, the preview results panel shows an Employer structure tree once the file has finished processing. The tree displays the department hierarchy that will be created during the import, with organizations that already exist in your project shown in bold. Click any branch node (or press Enter or Space when it is focused) to expand or collapse that part of the tree.
- If everything looks correct, click Run Import to complete the process.