Homepage overview
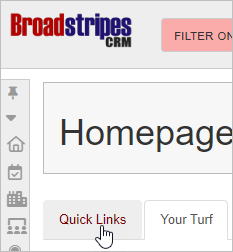
Your Broadstripes homepage gives you customized, at-a-glance insight into your project. Open your homepage by either clicking the Broadstripes logo at the top left corner of any page, or the Homepage link in the left-hand navigational toolbar.
Your homepage tabs
Once you’re on your homepage, you’ll see your project’s most important information organized across several tabs. The tabs that appear depend on your project configuration and your permissions.
Home
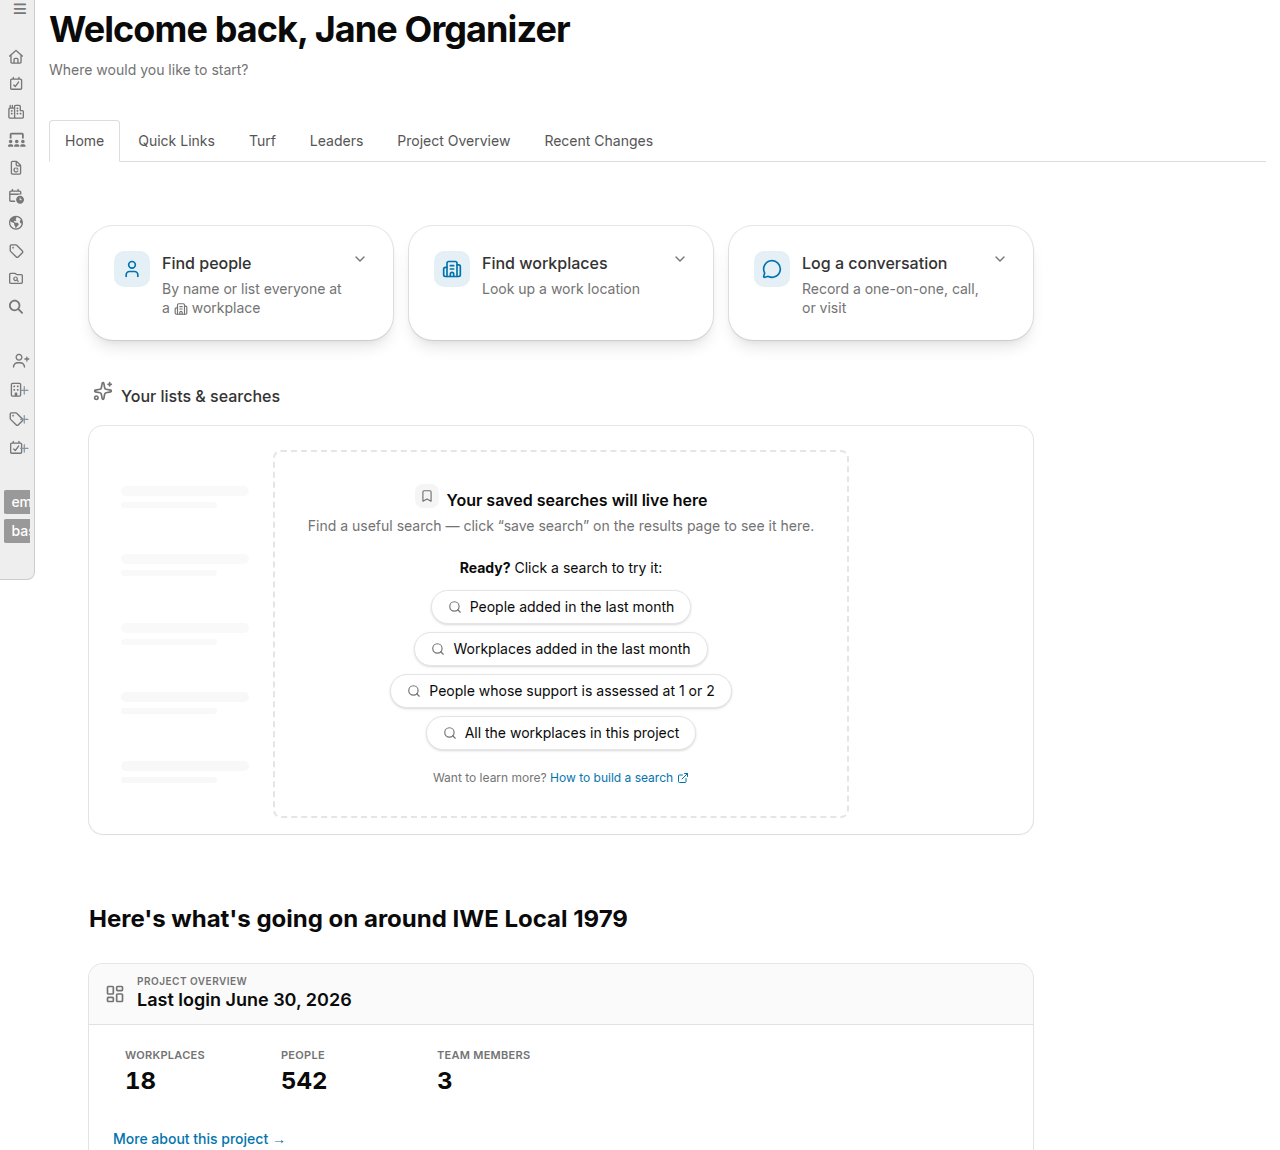
The Home tab is the default starting view for every user and is always the first tab on your homepage. When you navigate to your homepage, you land here.Quick action cards
At the top of the Home tab, three expandable action cards give you immediate access to the most common daily tasks:- Find people - Search for a contact by name, or browse everyone at a specific workplace. Click the card to expand it, then type a name or select a workplace from the dropdown.
- Find workplaces - Look up a work location by name. (This card appears only when your project has workplaces in view.)
- Log a conversation - Record a one-on-one conversation, phone call, or in-person visit with a contact. Click the card to expand it, find the person you spoke with, and fill in the details.
Getting started checklist
New users see a Getting started checklist on the Home tab that tracks five key milestones: running your first search, viewing a record, opening a Quick View, saving a journal entry, and creating a saved search. Once you complete all five, the checklist transitions to a completion card that you can dismiss.Search hub
Below the action cards, a Search hub displays your saved searches and quick links so you can jump directly to the tasks you use most.Project snapshot
The lower section of the Home tab shows live data about your project and your workplaces:- People not reached - Contacts in your workplaces who have not yet been contacted.
- Assessments - A breakdown of how workers in your workplaces are currently assessed.
- People with no leader - Workers in your workplaces who have not yet been assigned a leader.
- Maps - A shortcut to map views of your saved searches (appears when maps are enabled for your project).
Quick Links
The Quick Links tab is a customizable page where your most frequent searches or reports are just one click away. This means that with quick links, you have a single point of access for the things you use most. Quick links are also fully customizable, so you can add and remove links from your quick links tab to meet your changing work demands. (Learn more about customizing quick links – including choosing output formats – in the Create quick links article.) Many users start at the Quick Links tab to easily jump to the tasks they do each day, including:- opening data entry views
- generating PDF lists
- generating aggregated status reports
- running your most frequent searches
How to use your Quick Links
Here’s how to use quick links to manage common tasks:-
Click the homepage link in the navigational panel.
-
From the homepage, click the Quick Links tab.
- All of your quick links will be displayed on the tab as buttons.
-
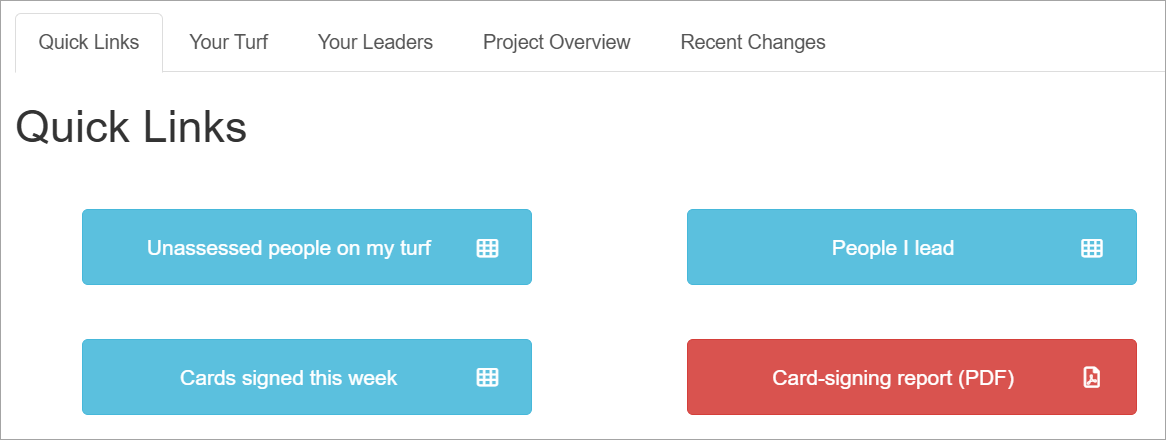
Here’s a look at what each of the four buttons shown below will do. (Note: since quick links are set up by you or your admin to match your specific workflow, the links you see will be different than those shown below.)
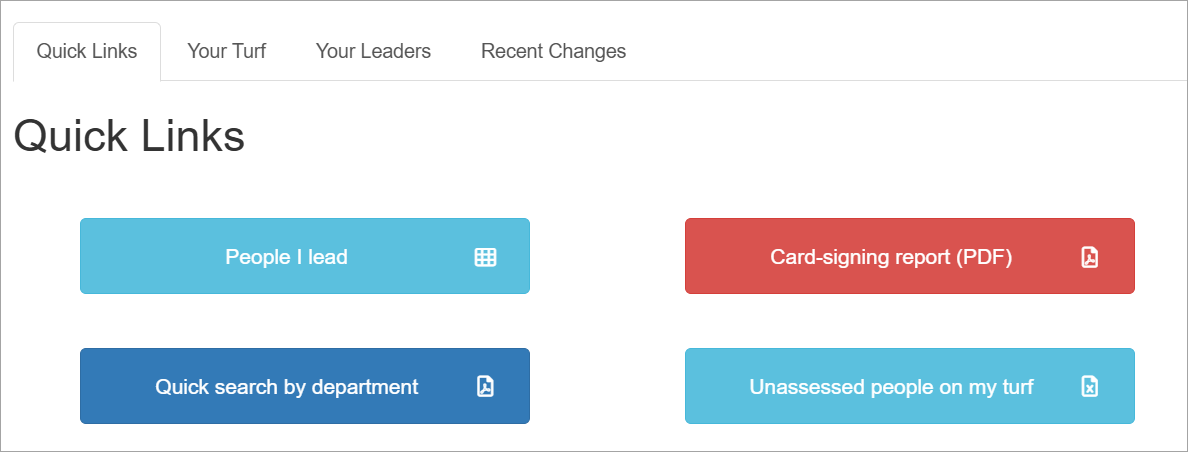
- Launch a search: Clicking the button “People I lead”, takes us immediately to a search results data view panel where we can view or update records.
- Download a Status report: Clicking the button “Card Signing Report” generates a fully-updated status report that we can download as a PDF – all with just the click of a button.
- Generate a quick search: Clicking the button “Quick search by department” launches a dynamic search that then automatically generates search results in the user-specified format.
- Download an Excel report: Clicking the button “Unassessed people on my turf” generates a spreadsheet report in XLSX format that we can download and manipulate offline with Excel – all with just the click of a button.

Turf
The Turf tab gives you a dashboard of the workplaces in your organizing territory. Each shop or department appears as a row showing key metrics such as worker count, assessment distribution, and any calculated columns your administrator has configured.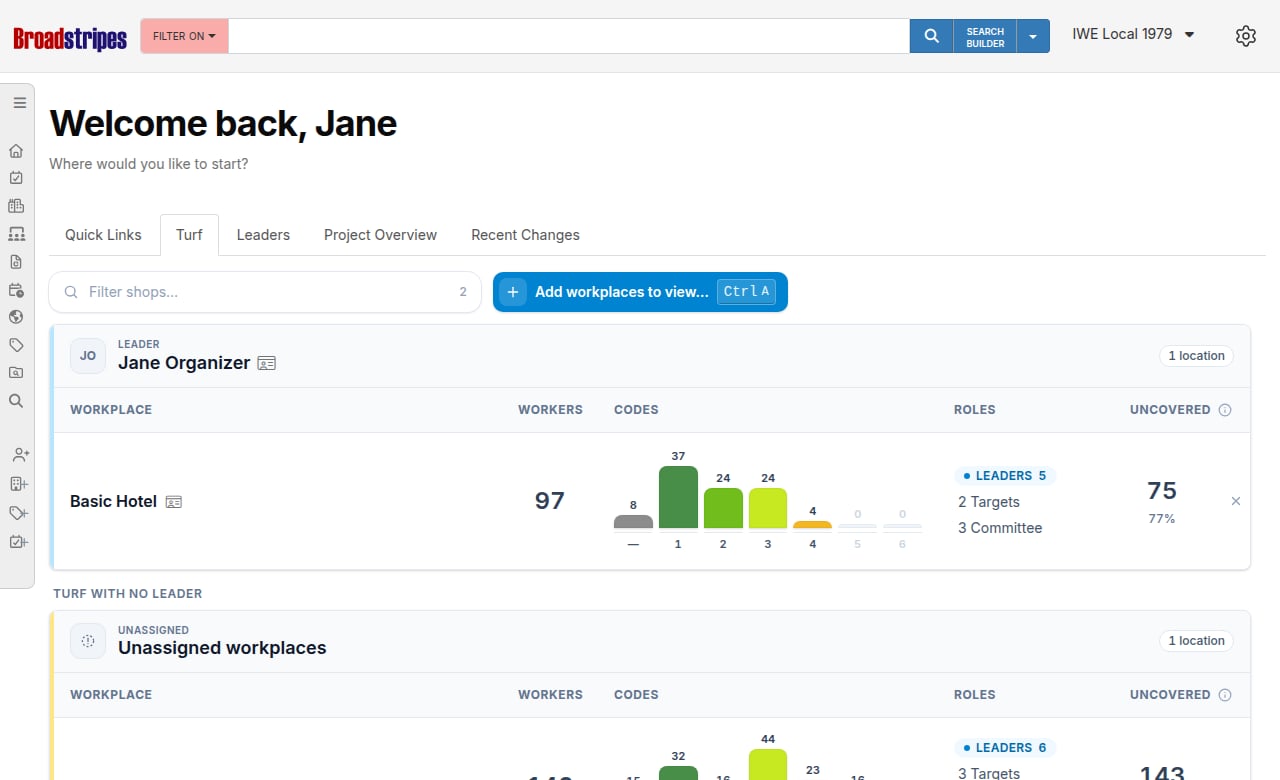
How shops are organized
Shops on the Turf tab are grouped by their assigned leader:- Your shops (where you are the assigned leader) appear first.
- Shops led by colleagues appear below, under an Other leaders’ turf section divider.
- Shops with no assigned leader appear at the bottom, under a Turf with no leader section divider.
Navigating shop data
Click a shop’s name to open its overview page, which shows the shop’s child departments and detailed worker information. Click the worker count in the Workers column to open a list of all workers at that shop.Filtering shops
A Filter shops… box appears in the toolbar once you have at least one shop on the panel. Type any part of a shop name to narrow the list; the count next to the box updates as you type (for example, “3 of 7”). Click the X button to clear the filter.Reports
If your project has status reports or spreadsheet template reports configured, buttons appear in the toolbar above the shop list:- Status Reports (all shops) - Click to open a filterable dropdown of all available status reports. Click a report name to download it as a PDF, or use the web or Excel format links if available. Press Cmd+B (Mac) or Ctrl+B (Windows/Linux) to open this dropdown from anywhere on the tab.
- Spreadsheet Templates - Click to open a filterable dropdown of available spreadsheet template reports. Type to filter. Press Cmd+U (Mac) or Ctrl+U (Windows/Linux) to open.
Adding workplaces
Click Add workplaces to view… () to open the Add workplaces to view dialog. You can also press Cmd+A (Mac) or Ctrl+A (Windows/Linux) to open it when focus is not in a text field.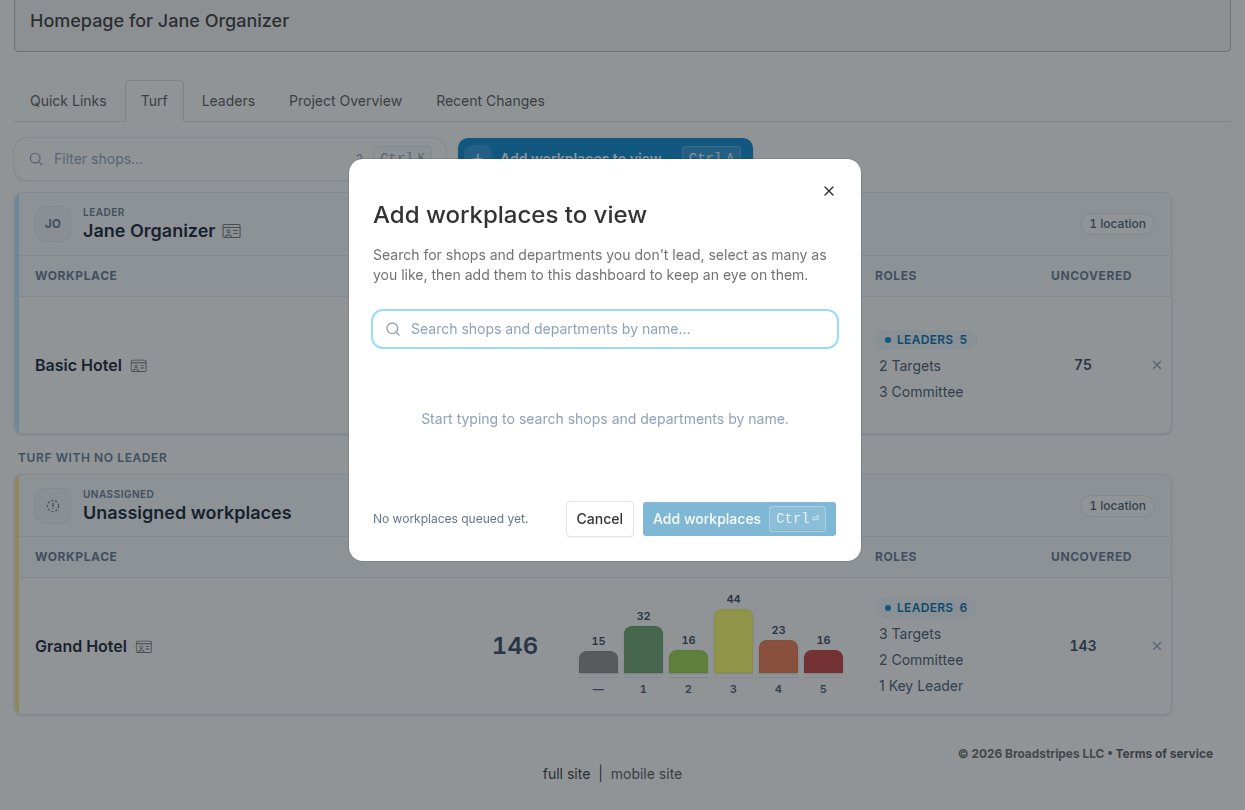
Hiding and removing shops
Each shop row has an action button on the right:- Remove - Shops you added manually show a remove (X) button. Clicking it removes the shop from your panel. You can add it back at any time from the Add workplaces to view… dialog.
- Hide - Shops that are part of your assigned turf show a hide button. Hiding a shop removes it from view without changing the leadership assignment.
Leaders
The Leaders tab presents a card-based view of your project’s leaders, giving you a quick overview of your leadership structure and the people and organizations each leader is responsible for.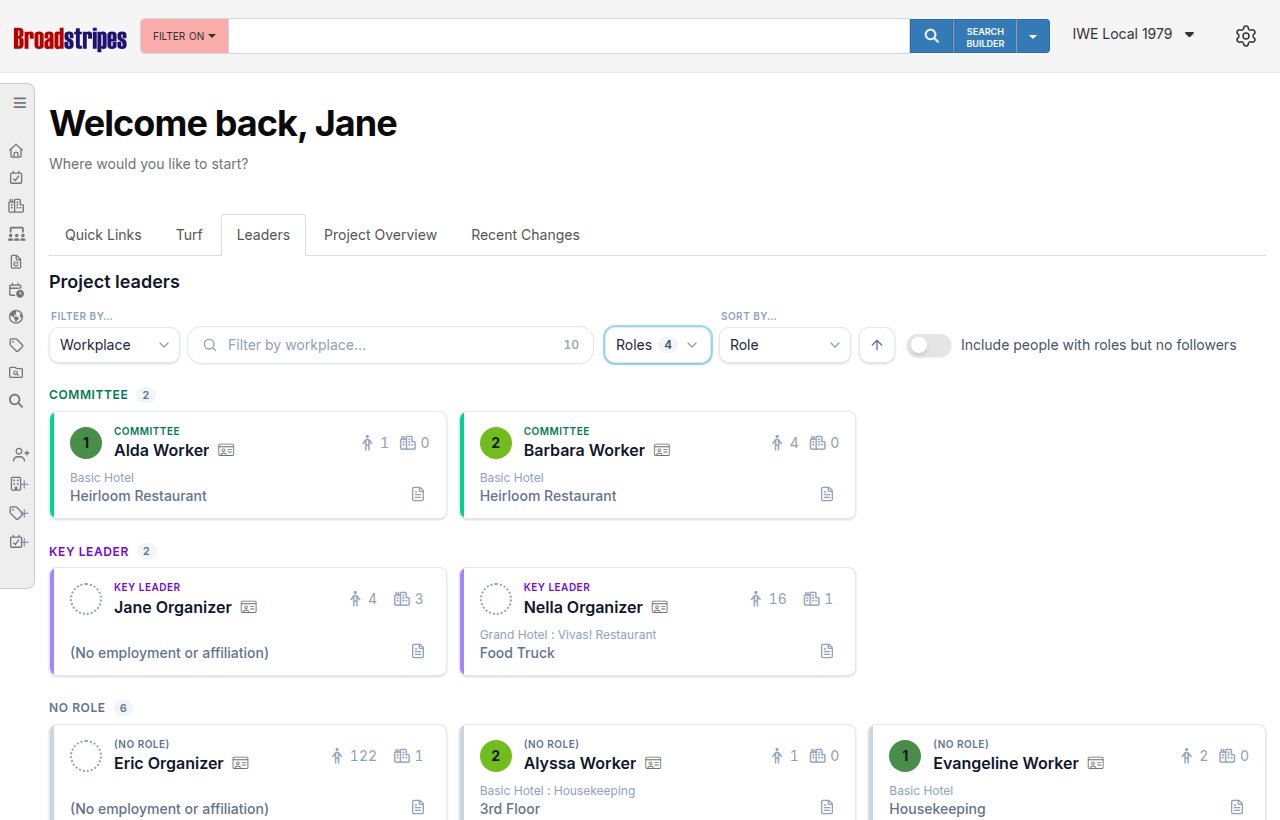
What appears on the Leaders tab
The Leaders tab shows every person in your project who currently leads at least one other person or organization. If your project has leader roles configured, people assigned a leader role also appear (even before they have been given any followers), and the tab defaults to showing only the leaders in your project’s top role positions. You can adjust which roles are visible using the Roles filter.Understanding each leader card
Every leader appears as a card showing:- Assessment disc - A colored circle showing the leader’s current assessment code. Hover over it to see the assessment label and who set it. If the leader has not been assessed, a dotted circle with an “Unassessed” tooltip appears instead.
- Role name (color-coded label) - The leader’s assigned role, or “Leader” if no role is assigned. Each role gets a distinct color so you can spot role groups at a glance.
- Leader name - Click to open the leader’s Organizing dialog, where you can view and update their leadership details
- Quick View - Click the icon next to the leader’s name to open a Quick View popover with their full contact record, including inline name editing
- People count - The number of people this leader currently leads. Click the count to open a search for those followers in a new tab (only available when the count is greater than zero).
- Org count - The number of organizations this leader currently leads. Click the count to open a search for those followers in a new tab (only available when the count is greater than zero).
- Employer / primary organization - Click to open that organization’s overview page
- User badge - Appears when the leader has an active Broadstripes user account
- Report icon - Click to generate and download a PDF leader report for this person
Filtering and sorting leaders
Use the toolbar above the cards to find the leaders you need: Filter: Use the Filter by… dropdown to choose what to search:- Workplace (default) - narrows the list to leaders whose primary workplace name contains your typed text.
- Leader name - narrows the list to leaders whose name contains your typed text.
- Role - Groups leaders by their assigned role position (only available when your project has roles configured). Leaders without a role appear last within the sorted list.
- Last name - Alphabetical by last name, then first name (default on projects without roles)
- First name - Alphabetical by first name, then last name
- Workplace - Alphabetical by primary workplace name. Leaders with no workplace always appear at the bottom, regardless of sort direction.
- People count - By number of people led, lowest to highest
- Org count - By number of organizations led, lowest to highest
Role filter (projects with leader roles)
If your project has leader roles configured, a Roles button appears in the toolbar. Click it to open a dropdown where you can check or uncheck individual roles. A No role option controls leaders who have not been assigned any role. The badge on the button shows how many roles are currently selected.- Check all - Select every role at once
- Uncheck all - Deselect every role at once
- Reset to default - Restore the default selection (your project’s senior leadership roles), available when the selection has been changed
Include people with roles but no followers
When role filtering is active, a toggle labeled Include people with roles but no followers appears in the toolbar. By default only people who currently lead at least one person or organization are shown. Turn on this toggle to also display people who hold a leader role but have not yet been assigned any followers.Working with leaders
Open the Organizing dialog Click a leader’s name to open the Organizing dialog for that leader. From there you can view and update their leader role assignment and review their follower list and leadership history. Role changes you make in the dialog are reflected on the card immediately without a page reload. Edit a leader’s contact record Click the Quick View icon next to a leader’s name to open a Quick View popover with their full contact record. You can edit the leader’s name and other contact details directly from the popover. Name changes take effect on the card immediately without a page reload. View a leader’s employer or primary organization Click the employer name on a card to open that organization’s overview page. Generate a leader report Click the report icon on a card to generate and download a detailed PDF report for that leader.Empty states
| Situation | What you see |
|---|---|
| No leader roles defined and no leaders assigned | A prompt to create leader roles, with a link to the Leader Roles settings page |
| Leader roles defined but none assigned to anyone | A message listing the defined role names and a link to learn how to assign them |
| Role filter matches no leaders | ”No leaders match the selected roles” - check more roles in the Roles filter |
| Filter matches no leaders | ’No leaders match “[your search]”’ - try a different search, switch the Filter by… field, or clear the filter |
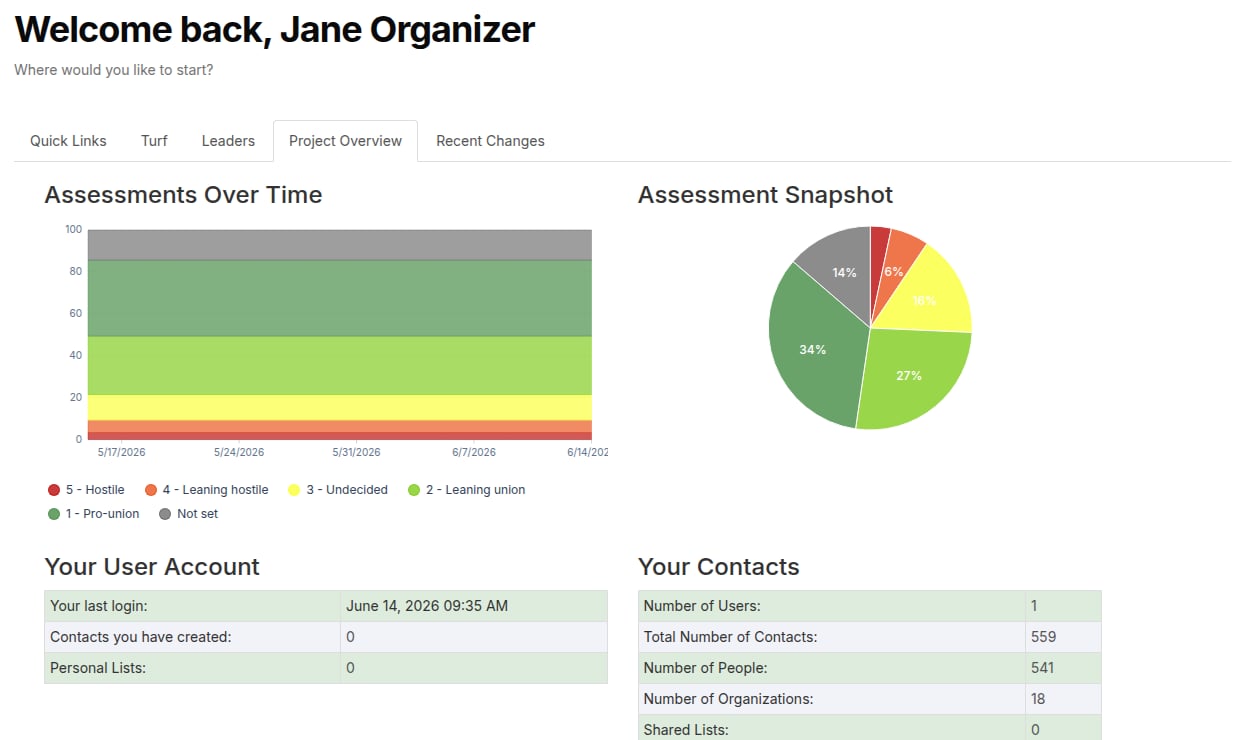
Project Overview
The Project Overview tab offers a broad assessment of your project. Like the Turf tab, it provides quick links to all of your custom reports. It also shows two interactive charts:- Assessments Over Time - A stacked area chart showing how your project’s assessment codes have shifted over time, expressed as a percentage of all assessed contacts. Click any code in the legend below the chart to show or hide that series. Hover over any area to see the exact count for the nearest data point.
- Assessment Snapshot - A pie chart showing how assessments are currently distributed across your contacts. Hover over a slice to see the code name and contact count.
The Project Overview tab is will not be visible if your project has limited visibility enabled.
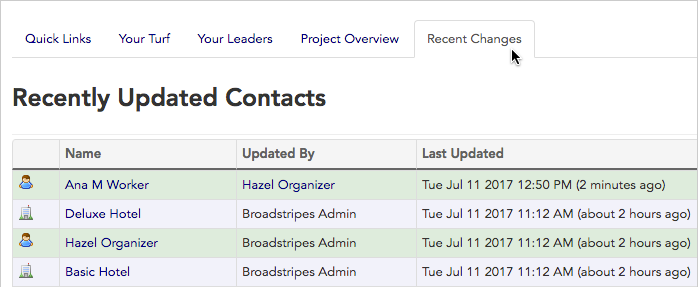
Recent Changes
Recent Changes tab shows the last 25 contact records (both organizations and people) to be updated across your entire project. You’ll also see the name of the Broadstripes user who edited the record and the exact time the change was made.