

Public forms creation
On the first page in this series, the public forms overview page, we looked at some of the different ways public forms could be used. In this documentation, we’ll create a public form to capture signed digital cards submitted by the members of a bargaining unit. To accomplish this we will need to:- Navigate to the Public forms page
- Click the New Public Form button for a person
- Name and configure the form
- Select fields to include on the form
Before you start, think about whether the form you want to build will, when submitted, create or update a person record or an organization record (i.e. a shop or department) in Broadstripes. In most cases, public forms are used to create or update people, not organizations. Therefore, this documentation describes the creation of a digital card public form for a person.
Step 1: Navigate to Public forms
To create a public form, you must be an admin in your project. As with most admin-only functionality, Broadstripes’ Public forms index page is accessible via the Settings menu.- Click Settings in top right corner of the app
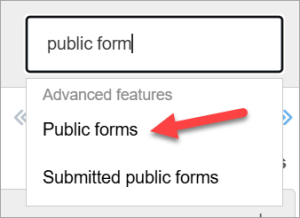
- Type “Public forms” in the filter input box
- Click the Public forms option
Step 2: Start creating the form
On the Public forms index page, click one of the buttons to create a form:- New person form - For individual contacts (workers, volunteers, members)
- New org form - For organization contacts (shops, departments, companies)
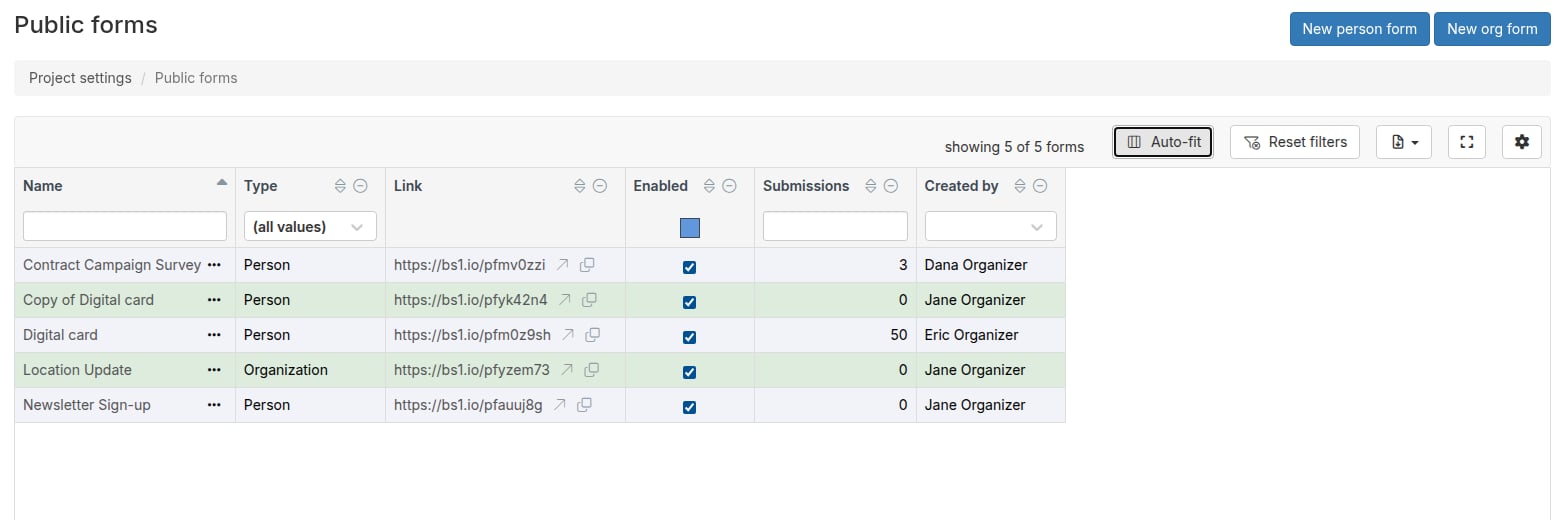
Most campaigns use person forms for worker sign-ups and organizing. Organization forms are less common and typically used for employer/shop data collection. This documentation focuses on creating a person form.
Step 3: Name your public form
The next step in building our form is to name it and configure basic settings in the public form editor. Type the name of your form into the Name field input box.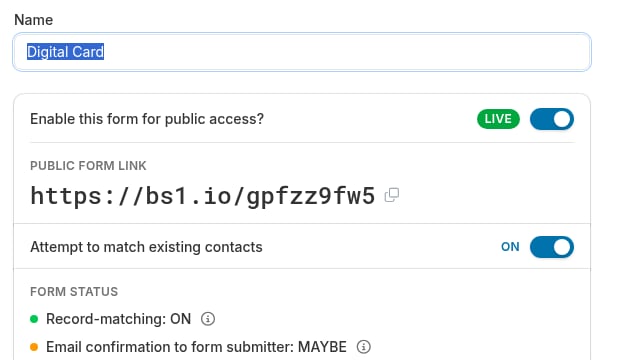
- “2025 Worker Interest Card”
- “Training Registration - March”
- “Shop Steward Application”
- “Volunteer Sign-Up”
- “Digital Membership Card”
- “Form 1” (not descriptive)
- “Test” (unclear purpose)
- Generic names like “Card” (specify the year or campaign)
Step 4: Enable the form for public access
Below the name field, the public-access card shows the Enable this form for public access? toggle, a Live or Not public status pill, and the form’s permanent public form link. Make sure the toggle is on. If it is off, the form is inactive. Anyone who uses the permanent URL associated with this public form will not be able to complete the form. When enabled:- The form is accessible via its public URL
- Anyone with the link can open, complete, and submit the form
- Form submissions are processed and create/update contacts
- The form URL shows an error message
- No submissions can be made
- Useful for temporarily pausing submissions or testing changes
Step 5: Configure duplicate matching
Below the public-access card, you’ll see the Attempt to match existing contacts toggle. When enabled (recommended):- Broadstripes searches for existing contacts with matching email or phone number
- If found, the form submission updates the existing contact instead of creating a duplicate
- If not found, a new contact is created
- Helps keep your project data clean
- Always creates a new contact
- May result in duplicate contacts if someone submits multiple times
- Single-value fields (like assessment or custom dates) are updated with the new value
- Multi-value fields (like phones or emails) preserve both old and new values
Step 6: Review the Form status panel
Below the matching toggle, the Form status panel summarizes two signals about how the form will behave. Hover over the info icon () next to either line for details.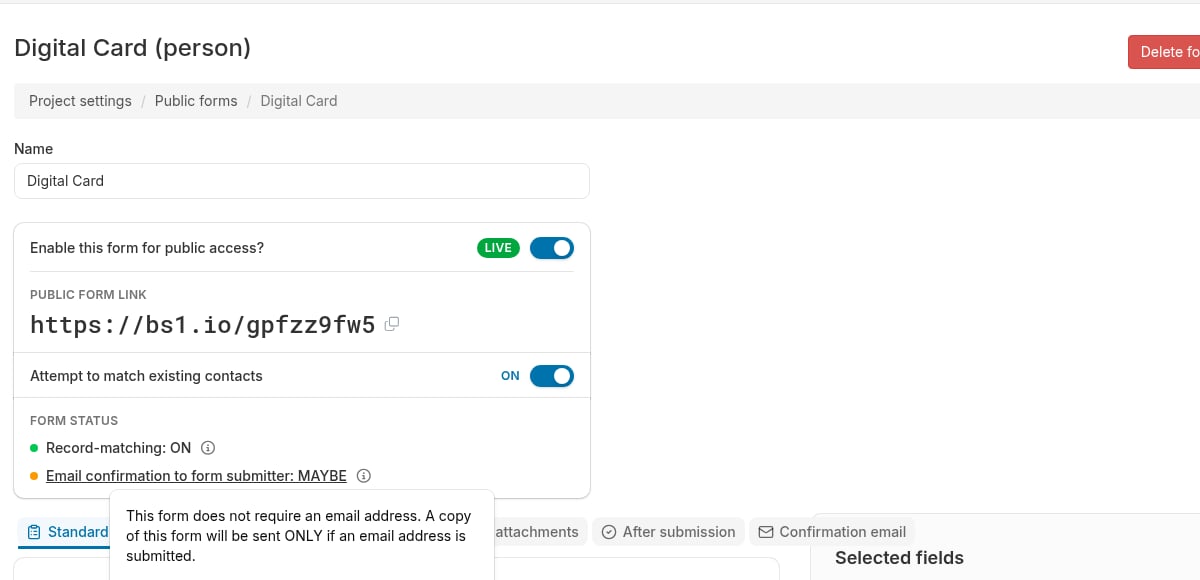
- Reflects the matching toggle above
- The info popover explains the fuzzy name matching logic and which fields are used for matching
- Shows whether submitters will receive a confirmation email, based on your settings in the Confirmation email tab
- MAYBE means the form does not require an email address, so a copy is sent only when the submitter provides one
- The info popover notes NLRB compliance requirements for authorization cards
Step 7: Understand the form editor tabs
The form editor has a tabbed interface with six tabs — person forms show a Workplace tab, and organization forms show an Organization tab in its place. You’ll configure different aspects of your form in each tab:- Standard fields - Select which standard fields appear on the form
- Timeline - Configure automatic timeline entry creation
- Workplace - Set up employer information collection (person forms only)
- Organization - Allow submitters to select an existing organization from the project (organization forms only)
- Content and attachments - Customize logo, header, introduction, legal text, signature field, and file attachments
- After submission - Set the confirmation message, event steps, contact type, and PDF settings
- Confirmation email - Configure confirmation emails to submitters and others
Step 8: Save your initial configuration
At this point, you might want to click the Save button at the bottom of the page. This will:- Save the form with the name you entered
- Preserve the enabled/disabled status
- Generate the permanent public form URL
- Return you to the main Public forms page (index page)
- Ensures your form is created with the correct name
- Allows you to see the generated public URL
- Prevents losing work if your session times out
- You can continue editing later
Next steps: Customize your form
Your form has been created and is ready to be customized. The next step is to indicate which fields you want on your form. The best place to start is the The “Standard fields” tab. The following articles discuss the functional details of each tab on the public form editor: Configure what information to collect:- The “Standard fields” tab - Choose contact info fields, custom fields, and events
- The “Timeline” tab - Create timeline entries for organizing interactions
- The “Workplace” tab - Collect employer/workplace information (person forms only)
- The “Organization” tab - Allow submitters to select an existing organization (organization forms only)
- The “Content and attachments” tab - Add logo, header text, introduction, legal agreement, signature field, and file attachments
- The “Confirmation email” tab - Set up confirmation emails with optional PDF attachments
- The “After submission” tab - Set the confirmation message, event steps, contact types, and PDF settings
- Viewing and downloading public forms - Access the public URL, test the form, and track submissions