

Timeline Tab
The Timeline tab allows you to automatically create a timeline entry when someone submits your public form. This creates a record of the interaction in the contact’s timeline history.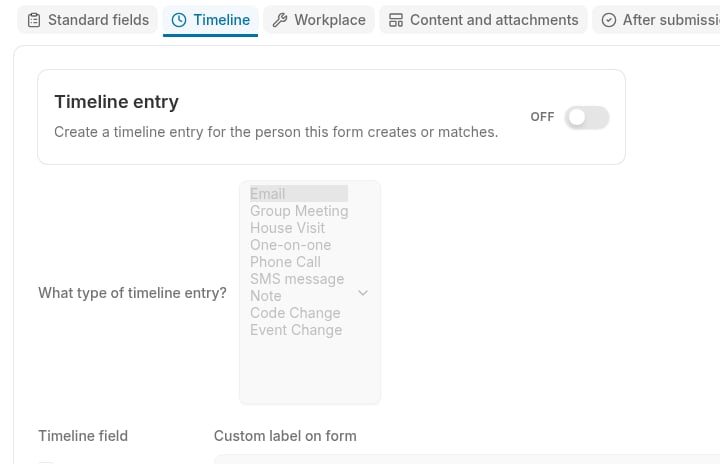
What is a Timeline Entry?
Timeline entries (also called timeline items) record interactions with contacts. They include:- Date and time of occurrence
- Type of interaction (phone call, door knock, text, etc.)
- Who made the contact (organizer name)
- Assessment (coded value indicating level of support)
- Notes about the interaction
Overview
At the top of the Timeline tab, you’ll see the Timeline entry card (“Create a timeline entry for the person this form creates or matches”).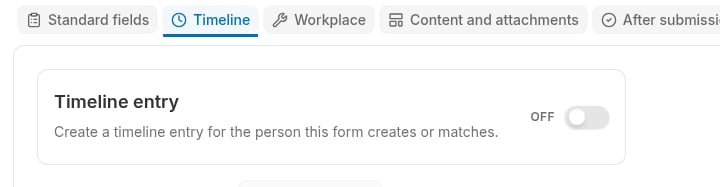
- A timeline entry is created each time the form is submitted
- The entry is linked to the new or matched contact
- The entry appears in the contact’s timeline history in Broadstripes
- If the form represents a real organizing contact (door knock transcription, event sign-up, interest card)
- When you want to track form submissions as organizing interactions
- For debrief forms that organizers fill out after conversations
- If the form is just updating contact information without an organizing interaction
- For simple data collection forms where the interaction isn’t meaningful
Timeline Type
What type of timeline entry? dropdown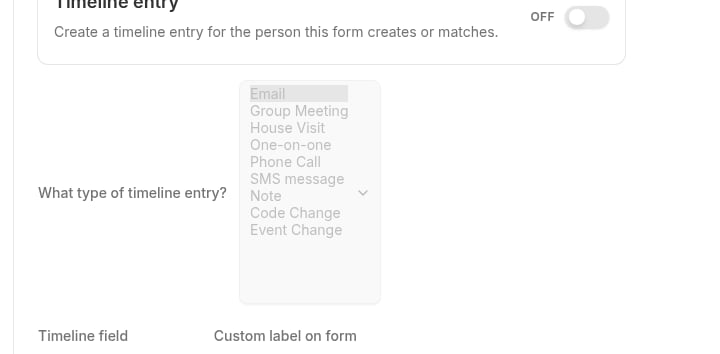
- Phone call
- House Visit
- One-on-one
- Group meeting
The list shows all timeline types configured for your campaign. Your administrator can create custom timeline types specific to your organizing work.
Timeline Fields
Below the timeline type, you’ll see a table with two columns:- Timeline field: The fields you can add to your form
- Custom label on form: The label that will appear to form submitters
- A checkbox to include it on the form
- A text input for customizing the label
Date of Occurrence
Default label: “Occurred on” The date when the interaction happened. Displays as a calendar date picker with a “today” button. When to include:- Event registrations (to capture event date)
- Incident reports (to capture when something happened)
- Sign-ups for future actions (to record the action date)
- “Event date”
- “Date of incident”
- “Action date”
- “Training date”
Time of Day
Default label: “Occurred at” The specific time when the interaction happened. Displays as a time picker with a “now” button. When to include:- Event registrations with specific start times
- Shift sign-ups
- Meeting registrations
- Most general sign-up forms (exact time is not relevant)
- “Event start time”
- “Shift time”
Contacted By
Default label: “Contacted by” A phone number or email address field that identifies who made the contact. Broadstripes will try to match this contact information (cell phone number or email) to an existing person in the app to find the organizer’s name. When to include:- Forms distributed by specific organizers (so they get credit for the contact)
- Events where you need to track which organizer recruited someone
- Paper forms transcribed by organizers
- Self-service online forms where no specific organizer is involved
- Anonymous forms
- “Organizer Phone”
- “Phone of Contacting Person”
- “Organizer Email”
- “Your Phone or Email”
Assessment (Code)
Default label: Your campaign’s code/assessment label (e.g., “Code”, “Assessment”, “Level”) The coded assessment value indicating the level of support or engagement. Displays as radio buttons with your campaign’s configured codes (typically 0-5 or 1-5). When to include:- Initial contact forms where organizers assess support level
- Follow-up forms to track changes in support
- Forms where you want the submitter to self-assess their level of interest
- Forms where assessment is not relevant
- Self-service forms where users can’t meaningfully self-assess
- “Interest level”
- “Support level”
- “How likely are you to vote yes?”
- “Commitment level”
The assessment scale in forms never goes to 100. Most campaigns use a 0-5 scale, sometimes extending to 7. The options displayed are based on your campaign’s configured assessment codes.
Description/Notes
Default label: “Description/Notes” Free-form text area for additional notes about the interaction. When to include:- Almost all forms benefit from a notes field
- Allows capturing context and details
- Gives submitters a place to add information not captured by other fields
- Very simple forms with a single purpose
- Forms where you want to minimize length
- “Additional comments”
- “Questions or concerns”
- “Tell us more”
- “What issues are most important to you?”
- “How can we help?”
Timeline Field Configuration Example
Here’s a typical configuration for a worker interest card:What the Timeline Entry Contains
When a form is submitted with timeline creation enabled, Broadstripes creates a timeline entry containing: Always included:- Submission timestamp (when the form was submitted)
- Timeline type (as selected in the dropdown)
- A note indicating it came from the public form
- Custom date of occurrence (if field was enabled and filled)
- Custom time of day (if field was enabled and filled)
- Contacted by value (if field was enabled and filled)
- Assessment/code value (if field was enabled and filled)
- Description/notes text (if field was enabled and filled)
Timeline Entry Visibility
Timeline entries created by public forms:- Appear in the contact’s Timeline section in Broadstripes
- Are visible to all users with access to the contact
Best Practices
Use timeline creation for organizing interactions: If the form represents a real organizing contact (door knock transcription, event sign-up, interest card), create a timeline entry. Skip timeline creation for data updates: If the form is just updating contact information without an organizing interaction, you may not need a timeline entry. Use meaningful timeline types: Create specific timeline types for your forms rather than reusing generic types. This makes reporting easier. Customize labels for your audience: Use language your form submitters will understand. “What got you interested?” is clearer than “Contacted by reason” for most audiences. Test the timeline: Submit a test form and check the contact’s timeline in Broadstripes to ensure it looks correct.Common Scenarios
Worker Interest Card
- ☑ Create timeline entry
- Timeline type: “Worker Interest Card”
- Include: Contacted by, Assessment, Notes
Event Registration
- ☑ Create timeline entry
- Timeline type: “Event Registration”
- Include: Date of occurrence (event date), Notes
- Skip: Time, Contacted by, Assessment (not relevant for event RSVPs)
General Contact Form
- ☐ Skip timeline entry
- (Or create minimal entry with just notes field)
Shop Steward Nomination Form
- ☑ Create timeline entry
- Timeline type: “Shop Steward Nomination”
- Include: Notes (for nomination details)
- Skip: Date, Time, Contacted by, Assessment
Next Steps
You can save or move on to the next tab to finish customizing your public form.- The “Workplace” tab - Configure employment relationships (person forms only)
- The “Content and attachments” tab - Customize the form’s appearance and enable file uploads
- The “Confirmation email” tab - Set up email notifications
- The “Standard fields” tab - Return to field selection