

Overview
The Confirmation email tab configures automatic email notifications sent when someone submits your public form. You can send confirmation emails to form submitters, notify employers, and alert your organizing team—all automatically. Email confirmations serve multiple purposes:- Confirm receipt of the form submission
- Provide transparency to form submitters
- Meet NLRB compliance requirements (for union authorization cards)
- Notify relevant parties (organizers, employers, administrators)
- Include PDF copies of signed forms
Configure email notifications for your public form
Follow these steps to set up email notifications:Step 1: Navigate to the Confirmation email tab
To get started, select the Confirmation email tab in the public form editor.Step 2: Choose who receives emails
At the top of the Confirmation email tab, you’ll see “Email recipients” with recipient options that vary by form type. All forms show the form submitter option; organization forms show additional leader notification options; person forms show an employer notification option.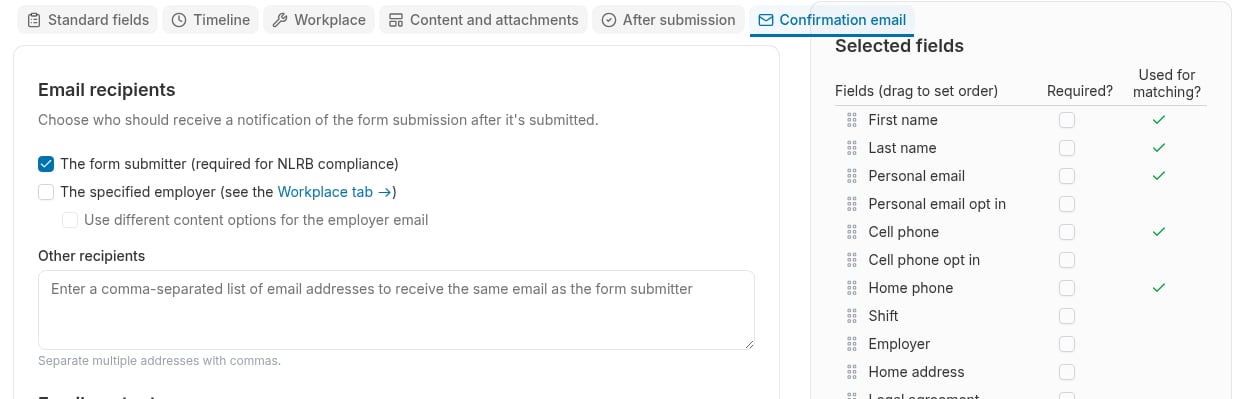
The form submitter (required for NLRB compliance)
Check this box to send a confirmation email to the person who submitted the form. When enabled:- An email is sent to the form submitter’s email address
- Email uses the subject and body you configure below
- Can include form data and/or PDF attachment
- Serves as confirmation that the form was received
- No email is sent to the submitter
- Not recommended for most campaigns
The organization’s direct leader (if any) (organization forms only)
Check this box to send a notification email to the submitted organization’s direct leader when the form is submitted. This option only appears for organization forms. When enabled:- An email is sent to the primary email address of the organization’s assigned leader in Broadstripes
- The email uses the same subject, body, and attachment settings as the submitter confirmation email
- If the organization has no leader assigned, or if the leader has no primary email address, no email is sent
- No notification is sent to the organization’s direct leader
- Forms where the organization’s own leader should be notified of each submission
- Workflows where the direct leader needs to act on or acknowledge the submission
The organization’s indirect leaders (people who lead parent orgs, if any) (organization forms only)
Check this box to send a notification email to the leaders of the submitted organization’s parent organizations in the hierarchy. This option only appears for organization forms. When enabled:- An email is sent to the primary email address of each leader of the organization’s ancestor organizations
- Leaders at multiple levels of the hierarchy receive the email (deduped so no one receives it twice)
- If no ancestor organizations have leaders with email addresses, no email is sent
- No notification is sent to leaders of parent organizations
- Campaigns where regional or national leaders need visibility into local submissions
- Hierarchical organizing structures where parent-org leadership tracks activity from child organizations
The specified employer
Check this box to send an email to the employer organization. This option only appears for person forms and only works when employment creation is enabled (see Workplace tab). When enabled:- An email is sent to the employer organization selected upon submission
- Email is sent to the organization’s primary email address in Broadstripes
- Uses separate subject and body when Use different content options for the employer email is checked (configured in “Employer email content” section below)
- No employer notification is sent
- Shop steward election forms (to notify management)
- Forms where the employer needs to be informed
- General organizing (you don’t want to tip off the employer)
- Interest cards (employer doesn’t need to know)
- Most worker sign-ups
See the Workplace tab to enable and configure employment creation. If employment creation is disabled, this email option won’t work because there’s no employer to notify.
Use different content options for the employer email
Check this box if you want to customize the email sent to employers differently from the email sent to form submitters. When enabled:- A separate “Employer email content” section appears below
- You can customize employer emails with different subject, body, and attachment options
- Employer emails (if enabled) use the same content as submitter emails
- Simpler configuration
Step 3: Add other email recipients (optional)
In the “Other recipients” field, you can enter additional email addresses to receive a copy of the confirmation email. Format: Enter email addresses separated by commas or semicolons Examples:- Notify organizers when new sign-ups come in
- Send copies to campaign staff
- Alert support staff for follow-up
- BCC campaign leadership
- Don’t add too many recipients (creates email overload)
- Consider using a shared inbox (like campaigns@union.org) instead of individual addresses
- Recipients get the SAME email as the form submitter
Step 4: Configure email content options
The Email content section controls what gets included in the confirmation email to form submitters.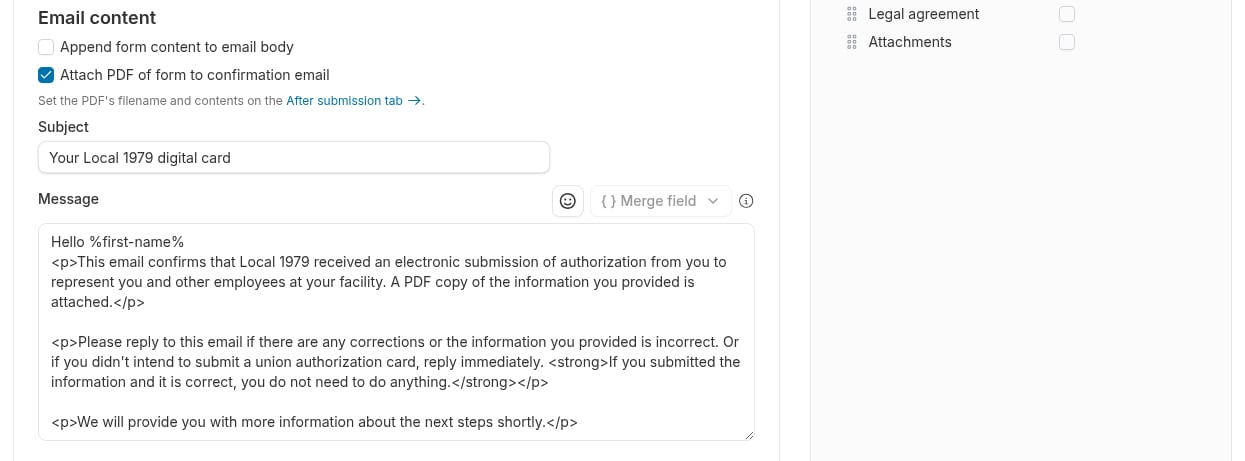
- The submitted form data is included at the bottom of the email body
- Shows field labels and values in a readable format
- Provides a text version of what was submitted
- Email only contains your custom message
- Cleaner, shorter email
- Enable this if you’re NOT attaching a PDF (provides a record of submission)
- Disable this if you ARE attaching a PDF (prevents duplication)
- Enable for simple forms where seeing data inline is helpful
- A PDF is generated containing all submitted form data
- PDF is attached to the confirmation email
- PDF includes all fields, signature (if captured), and form branding
- No PDF attachment (email only contains text)
- Enable for union authorization cards (NLRB compliance)
- Enable for legal documents or contracts
- Enable for applications where users need a copy
- Disable for simple interest cards or casual sign-ups (faster processing, smaller emails)
PDFs are always generated and stored in Broadstripes, even if you don’t attach them to emails. This option only controls whether the PDF is attached to the email.
Step 5: Write the email subject and body
Customize the confirmation email message that form submitters will receive. Subject line In the Subject field, enter the subject line for the confirmation email. Examples:- “Thank you for your interest in organizing”
- “Your worker interest card has been received”
- “You’re registered for the March meeting”
- “Welcome to the campaign”
- “Confirmation: Your application has been submitted”
- Start with a personalized greeting using %first_name% merge field
- Thank the submitter
- Set clear expectations about next steps
- Provide contact information if they have questions
- Include relevant links (website, Facebook group, etc.)
- Sign with organization name or organizer name
- Keep it brief—most people skim emails
Step 6: Configure employer email content (if applicable)
This section only appears if you enabled both “Send email to employer” and “Use different content options for the employer email” checkboxes in Step 2.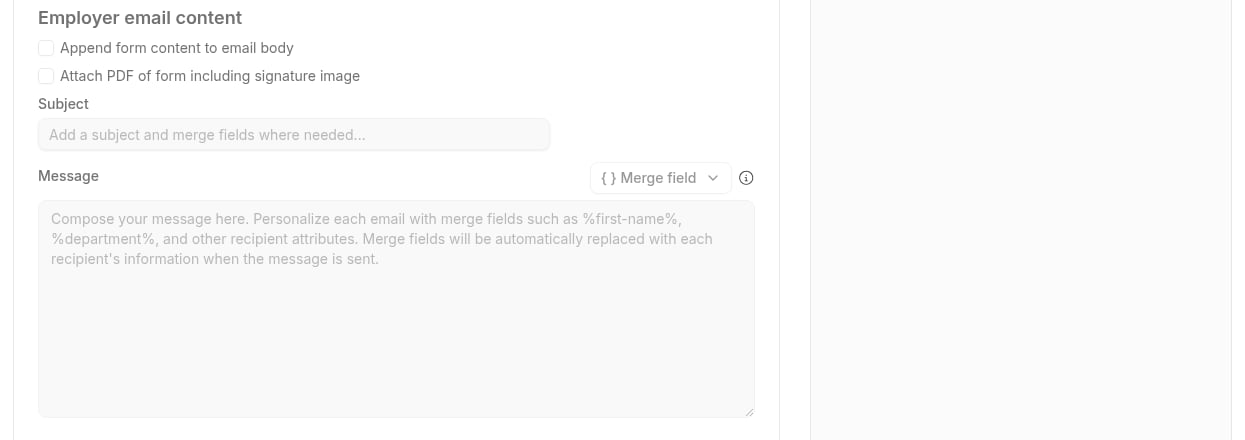
- Enable for payroll deductions (employer needs to see the details)
- Disable for most other uses (employer doesn’t need all the details)
- PDF of the full form submission is attached to the employer email
- Includes signature image if captured
- No PDF attachment
- “Shop steward election notice”
- “Employee authorization form submitted”
- “New grievance filed by %name%”
Step 7: Save your work
Once you’ve configured your email settings, click Save or move on to the next tab to continue customizing your form.Merge Fields
Merge fields are placeholders that get replaced with actual data when the email is sent. Available merge fields:- Name - Full name of the recipient (or form submitter in this case)
- First Name - Recipient’s first name
- Nickname or First Name - Uses nickname if available, otherwise first name
- Title and Last Name - Recipient’s title (if available) and last name
- Broadstripes ID - Unique identifier for the recipient
- Organizer Name - Full name of the recipient’s assigned organizer
- Organizer First Name - First name of assigned organizer
- Department - Recipient’s department (if employment data exists)
- Employer - Recipient’s employer organization
- Sender Name - Your full name (the person sending the email)
- Sender First Name - Your first name
- Custom fields specific to your project may also appear
- Click the “Select a merge field” menu and choose the desired field
- Or manually type the merge field surrounded by percent signs (%)
- The merge field is replaced with actual data when the email is sent
- Don’t overuse—too many merge fields feels robotic
- Remember some fields may be blank—structure your message so it still makes sense
Email Configuration Examples
Basic Interest Card Send email to:- ☑ The form submitter
- ☐ The specified employer
- Other recipients: campaigns@union.org
- ☐ Append form content to email body
- ☐ Attach PDF to email
- Subject: “Thank you for your interest, %first-name%”
- Body:
Union Authorization Card (NLRB Compliant) Send email to:
- ☑ The form submitter (required for NLRB compliance)
- ☐ The specified employer
- Other recipients: organizers@union.org
- ☐ Append form content to email body
- ☑ Attach PDF to email (NLRB requirement)
- Subject: “Your union authorization card”
- Body:
Simple Event Registration Send email to:
- ☑ The form submitter
- ☐ The specified employer
- Other recipients: events@union.org
- ☐ Append form content to email body
- ☐ Attach PDF to email
- Subject: “You’re registered for %event-name%”
- Body:
Email Delivery Notes
Timing: Emails are sent within a few minutes of form submission (not instant, but very fast) From address: Emails are sent from your organization’s outgoing email address on behalf of your organization (Please reach out to support to ensure your email address is configured correctly) Reply-to: The reply-to address is set to your organization’s email (if configured) Testing: Always submit a test form before launching to verify emails are sent and formatted correctlyBest Practices
Always send submitter confirmation: Builds trust and provides transparency Keep emails brief: Most people skim emails on their phones Set clear expectations: Tell people what happens next and when Test thoroughly: Submit test forms and check that emails are received and formatted correctly Use personalization wisely: Merge fields are great, but don’t overdo it Consider mobile: Many people will read these emails on their phones Proofread carefully: Emails go out automatically—typos affect many people Include contact information: Give people a way to ask questions or get helpNext Steps
- The “After submission” tab - Configure the confirmation message, event steps, contact type, and PDF settings
- The “Content and attachments” tab - Customize the form’s appearance and enable file uploads
- Viewing Forms - See what your form looks like to users
- The “Standard fields” tab - Return to field selection