

Overview
Events are one type of custom field in Broadstripes. Each event can be created to contain one or more “steps” (checkboxes) to capture particular actions in the workflow of a given campaign activity. Some examples of when you might use events include recording a worker’s involvement in rallies and marches, or the signing of a petition or union card. You should use events to record information that occurred at a certain time, whereas you’ll use built-in data fields or custom fields to record information that is always true. If you’d like to learn more about what events are and exactly when they should be used, take a look at the Create events to track your goals article in the User Guide.The Events page
To reach the Events page, click Events in the left-hand navigation panel. The page shows all your project’s events as expandable cards. A toolbar at the top lets you filter, search, and sort:- Active / Inactive / All toggle — switch which events are shown; each button shows a count.
- Search box — type to instantly filter events by name or step name. Cards whose steps match expand automatically to show the matching steps.
- Sort button () — choose from several sort options: most recently active, newest, oldest, most contacts, fewest contacts, name A–Z, name Z–A, ends soonest, or ends latest.
- Expand all / Collapse all icon buttons — open or close every visible card at once.
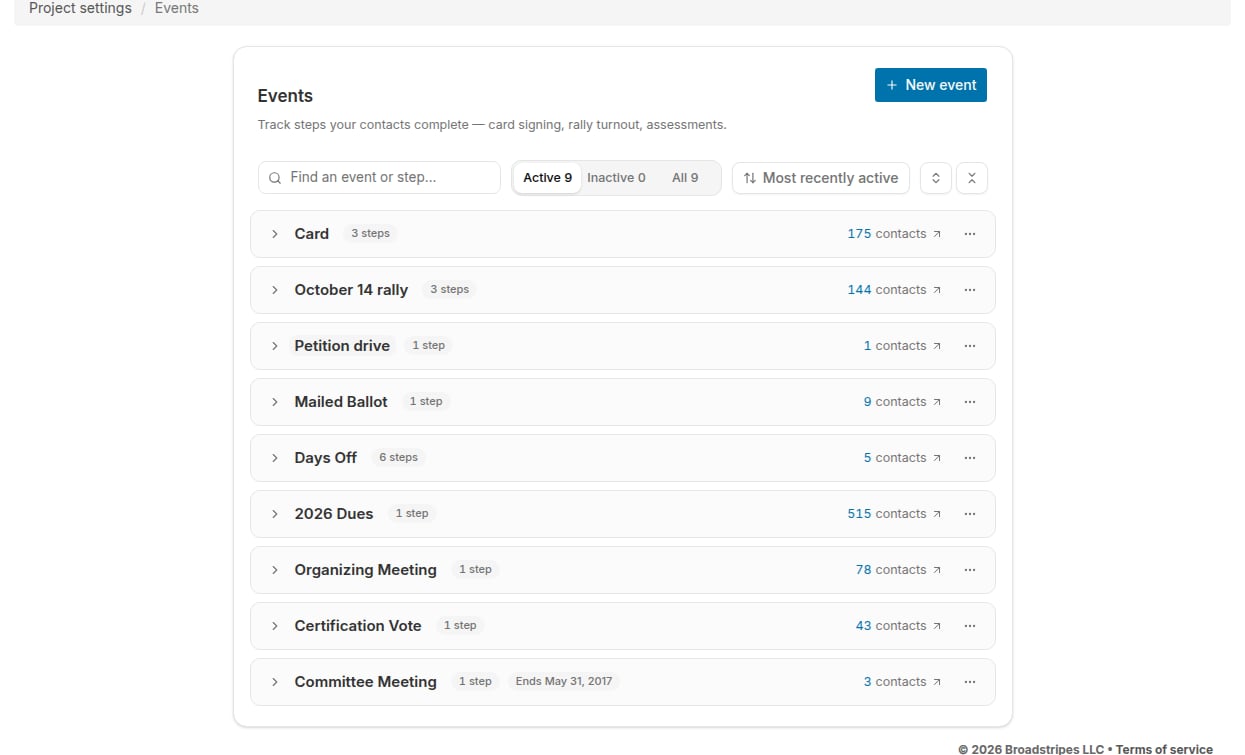
The Events page is accessible to all users, and any user can create, edit, and delete events. In a read-only project the page is view-only — the editing controls don’t appear.
Create an event
Together, events and event steps let you track information that’s important to your organizing efforts. In this example, we’ll set up an event for an external organizing card-signing drive named “Card” with steps named “Signed,” “On file,” and “Email sent.” (If you want to understand when it’s appropriate to use events and when it’s better to use another data object, please review the Data tools overview article or the Create events to track your goals article.)- Click Events in the left-hand navigation panel to open the Events page.
- Click the + New Event button in the toolbar. A new card appears at the top of the list with a name field ready to type in.
- Type the name of the event (e.g. “Card”) and press Enter (or click away) to save it. The event is created immediately and a blank step field appears so you can add the first step.
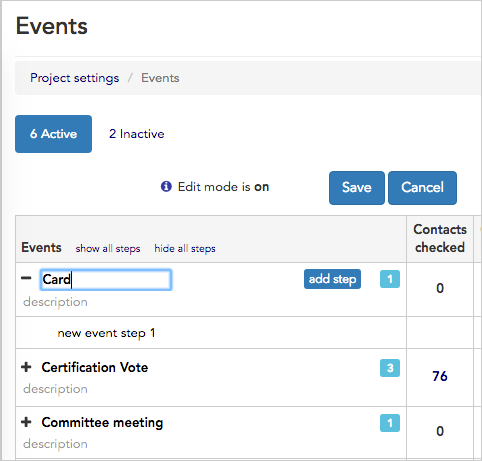
- Type the name of the first step (e.g. “Signed”) and press Enter to save it. A new blank step field appears automatically so you can keep adding steps.
- Add as many steps as you need (following our example: “On file” and “Email sent”), pressing Enter after each one. When you’re done adding steps, press Escape or click elsewhere to finish.
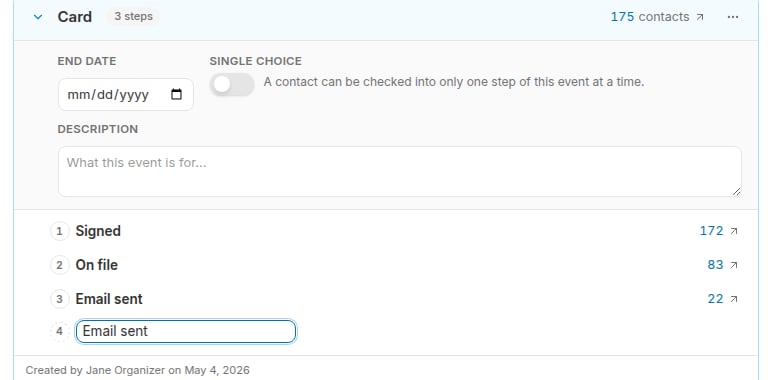
- That’s it — the event and its steps are saved as you go. There’s no separate Save button.
- Follow the steps above to create as many events as you want for each project (there is no limit to how many events you have).
View an inactive event
When an event ceases to be relevant to the active organizing work, you can make the event inactive. Inactive events are hidden from users’ data-entry forms and from most reports. To see inactive events, click the Inactive button in the toolbar. You can also click All to see active and inactive events together.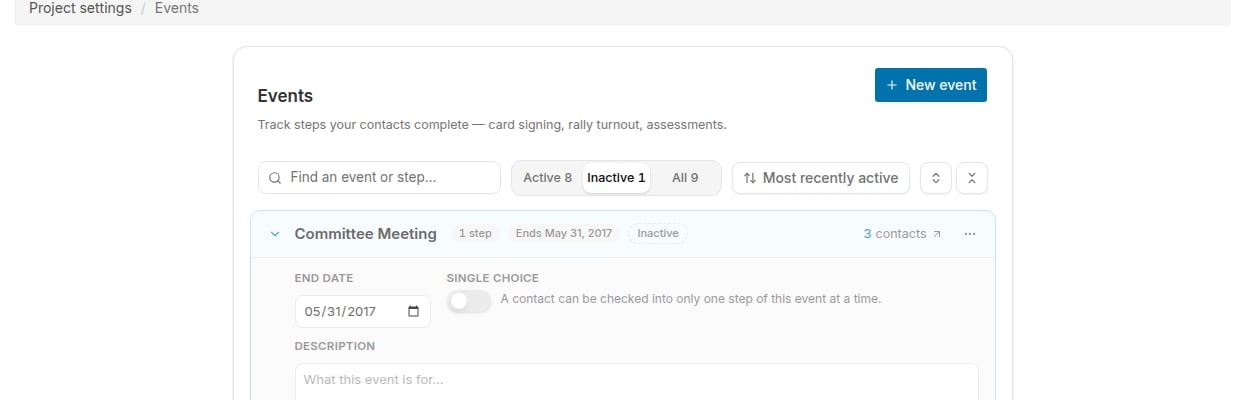
Event settings
When you expand an event card (click the chevron or click the header row), a details panel appears at the bottom of the card where you can set these options:- End date — the date on which the event ended or is scheduled to end. Optional.
- Single choice — when on, checking one step of this event automatically unchecks all others. Useful for mutually exclusive steps (like “Signed” and “Declined to sign”).
- Description — free-form notes about what this event tracks. The description is shown as a short summary line in the collapsed card header.
Step settings
Each step has a settings popover that you can open by clicking the step settings icon () on the step’s row. The popover has two sections: Behavior- Timeline tracked — when on, checking this step prompts the user to enter a timeline note. Use this for steps that represent a meaningful milestone you want recorded in a contact’s history.
- Detail reports — whether this step appears on contact detail reports.
- House visit sheets — whether this step appears on house visit sheets.
- Walk lists — whether this step appears on walk lists.
- Phone lists — whether this step appears on phone lists.
Make an event inactive
If you have an event that’s no longer important to your current work, but you aren’t ready to delete the information it tracks, you can deactivate it. Deactivating an event hides it from data-entry forms and most reports. If you ever need to see the data again, you can re-activate the event.- Click Events in the left-hand navigation panel.
- Find the event you want to deactivate (use the search box or browse the list).
- Click the more actions button () on the event card and choose Deactivate.
- The event immediately moves to the Inactive list.
Calculated columns and inactive events
If you have a calculated column whose search text refers to an inactive event or any of that inactive event’s steps, the column’s calculations will still display. To hide the column, delete the column from your layout or report.What if I want to see the event data again?
The data in a deactivated event remains in Broadstripes’ database. Because it’s inactive, the event and all its steps will disappear from data-entry forms, and they won’t show up on reports. You also won’t be able to search using values from that event as your search criteria. If you decide that you need to see the data again (or use it for a search or in a report), you can simply re-activate the event:Re-activate an inactive event
- Click Events in the left-hand navigation panel.
- Click the Inactive button in the toolbar to switch to the inactive event list.
- Find the event you want to reactivate.
- Click the more actions button () on the event card and choose Reactivate.
- The event and all its associated steps are now active again and the data will be viewable just as it was before being deactivated.
Edit an event
All editing on the Events page is inline — there’s no separate “edit mode” to turn on, and all changes save automatically.Rename an event
Click the event name in the card header. The name turns into an editable field. Make your changes and press Enter (or click elsewhere) to save. Press Escape to cancel.Rename a step
Expand the event card, then click the step name. The name turns into an editable field. Make your changes and press Enter (or click elsewhere) to save.Add a step to an existing event
Expand the event card and click the add step link at the bottom of the step list. A blank field appears — type the step name and press Enter to save it (or Escape to cancel).Reorder steps
Expand the event card, then drag the drag handle icon () on the left side of any step row to move it to a new position within the event. You can also use the move up () and move down () arrow buttons that appear when you hover over a step row.Move a step to a different event
You can drag a step from one event card and drop it onto another event card to move the step. If the target event card is collapsed, drop the step anywhere on the card header.Delete a step
Expand the event card, then click the more actions button () on the step row and choose Delete step. Broadstripes will ask you to confirm before deleting.Deleting a step removes it and all its history permanently. This cannot be undone.
Delete an event
Deleting an event is permanent
Deleting an event removes the event and all its associated steps and history permanently from your project. If you want to keep an event and its associated data in your project, but want it hidden from your users’ view, you should deactivate the event rather than delete it. Read more in the Make an event inactive section above.- Find the event you want to delete (use the search box or browse the list).
- Click the more actions button () on the event card and choose Delete event.
- Broadstripes will prompt you to confirm the deletion.
- The event and all its associated steps will be removed from your project. After deletion, the event and its steps will no longer show on any contact’s record, and all history of the event will be gone.