

The project actions menu
Each row in the projects table has an actions menu (⋯) next to the project name. It contains the member-management entry points: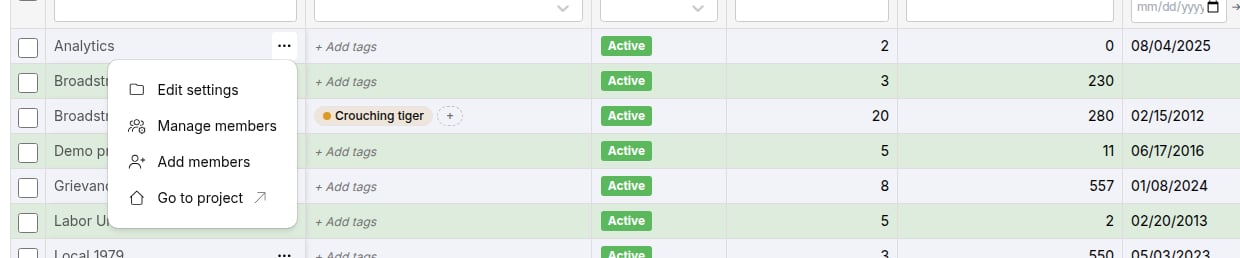
- Edit settings — opens the project’s general settings dialog.
- Manage members — opens a panel listing the project’s current members, where you can deactivate or reactivate memberships.
- Add members — opens the Add members page for the project.
- Go to project — opens the project itself in a new browser tab.
Add members to a project
Select Add members from a project’s actions menu to open its Add members page.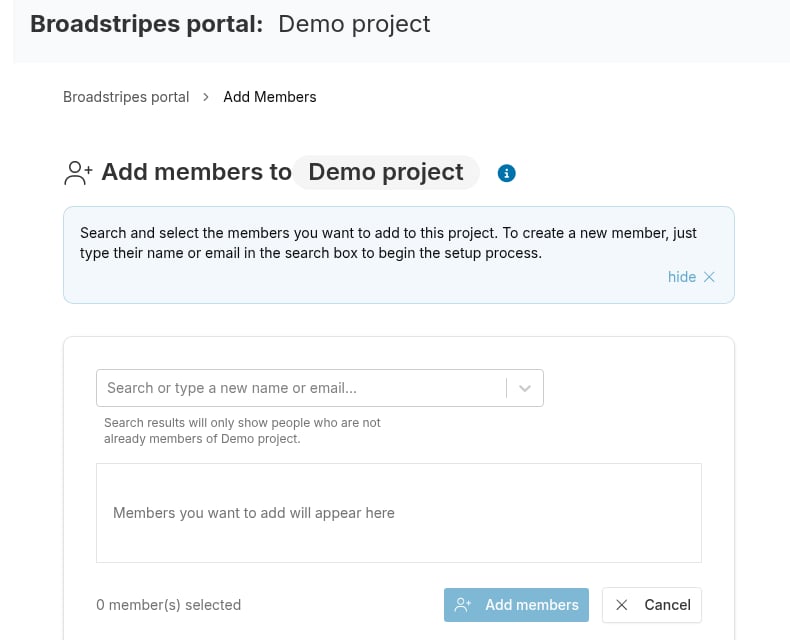
Set the role and permissions
Selecting a person opens the Assign project membership role dialog. Your selections apply only to this person’s membership in this project.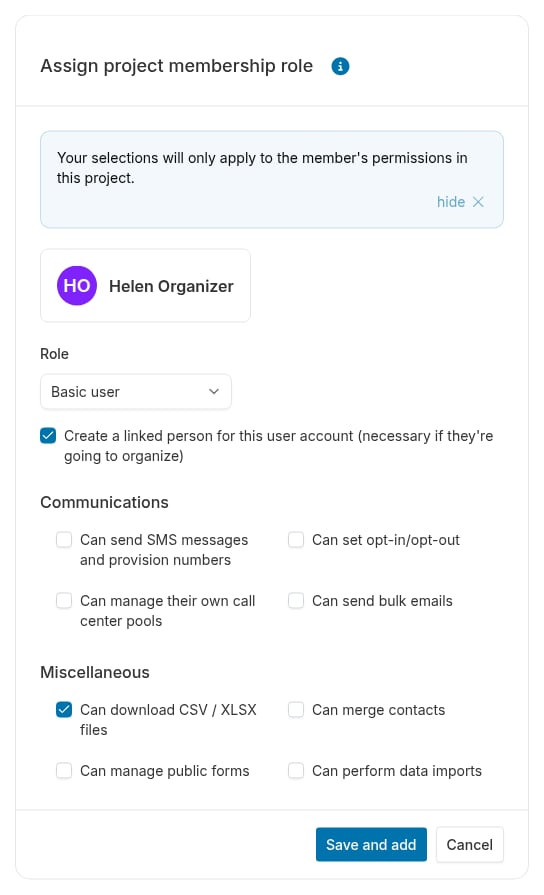
- Role (required) — Admin or Basic user.
- Create a linked person for this user account — checked by default; creates a person record for the user so they can organize. Not available on read-only projects.
- Permissions — once you pick a role, checkboxes appear for communications permissions (sending SMS, setting opt-in/opt-out, managing call center pools, sending bulk emails) and miscellaneous permissions (downloading files, merging contacts, and more). The available options vary by role — for example, only admins can be given Can manage members, and only basic users need Can manage public forms or Can perform data imports granted explicitly.
Add someone who is new to Broadstripes
To invite a person who doesn’t have a user account yet, type their name or email address in the search box and select Create a new member named ”…”. A short setup wizard walks you through three steps:- Create user account — first name, last name, and email address, plus an optional note for the invitation email.
- Assign membership role — the same role and permission choices described above.
- Finish — a review of what happens next.
Save your selections
Staged people appear as removable chips with their role badge, and an amber reminder reads Pending. Click ‘Add members’ to save. Nothing is saved until you click the Add members button, which shows a count of how many people you’re adding. When you save, Broadstripes adds the members, emails an activation link to anyone you invited as a new user, and returns you to the union portal dashboard with a confirmation toast.Deactivate or reactivate a membership
Removing someone from a project is done by deactivating their membership — memberships are never deleted, so you can always reactivate them later. Select Manage members from a project’s actions menu to open the project members panel. It lists each member’s name, email, last active date, membership status, and role.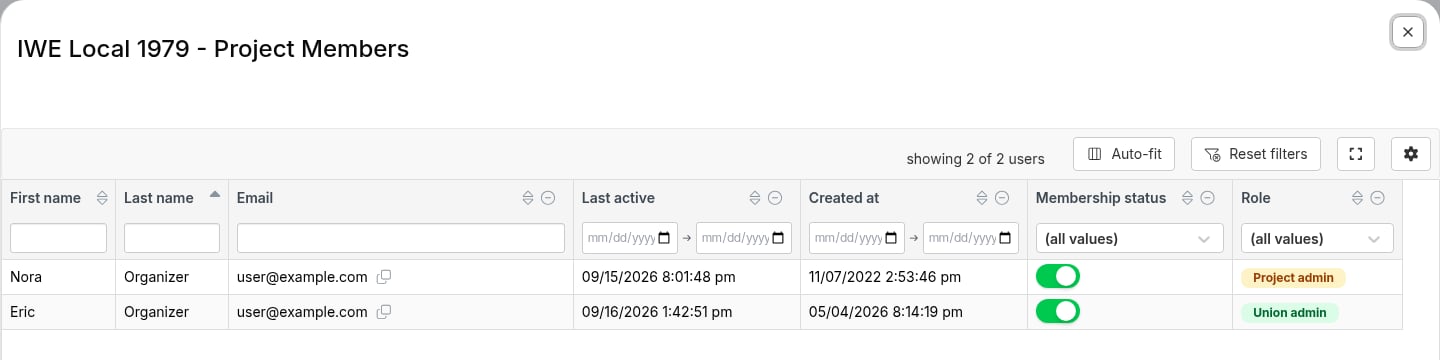
View one person’s memberships across projects
From the Users tab of the dashboard, hover over a person’s Membership status cell and click the View user memberships icon (). You can also select a person from the union portal header search.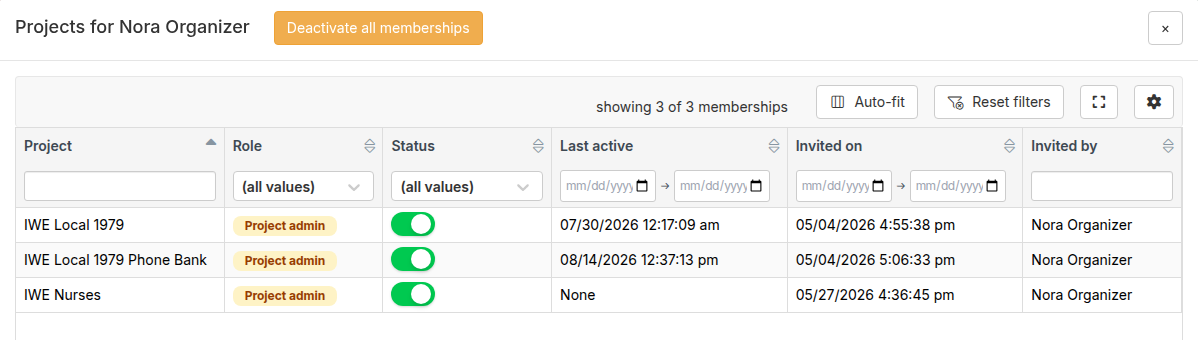
- Toggle any single membership’s Status to deactivate or reactivate it, just like in the project members panel.
- Click Deactivate all memberships to deactivate the person’s memberships in every project at once — useful when someone leaves your organization.
This dialog is for reviewing and deactivating only. To add the person to another project, use that project’s Add members page.