General settings allow you to customize your Broadstripes project to match your organization’s workflow. With general settings, you can select how you want certain key fields to be labeled, choose basic user permissions, and pick a default layout for displaying search results, among other things.As an administrator, you can choose these settings just once, and they will be automatically applied across the project for all your users. Every setting on this page saves automatically the moment you change it — there is no Save button. A brief “Saved” indicator appears next to each setting after it saves successfully.On wider screens, the settings display in two balanced columns to make better use of the space.Many settings include a help button next to the control. Clicking it opens a short explanation of what the setting does.
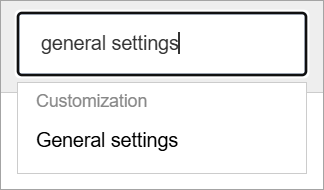
To get started, access General settings by clicking the Settings menu at the top right of the page and typing “settings” in the menu filter box.
The General settings page will open, organized into cards: Defaults, Basic user permissions, Visibility (if your project has the limited visibility feature), Data imports, and Language.
Layouts let you customize the appearance of the search results panel – the page that opens any time users run a search in Broadstripes. If your project has multiple organizers entering a lot of information, a good layout helps your users view and record information in the most effective way possible.If you’ve saved a layout, you can select it as the default on the General settings page. Selecting a default search layout means that any time a user runs a search, the results will appear using the layout you’ve chosen. Users can also choose to create and save their own search results layouts, but by default, the layout you select in General settings will be used if no other layout is specified. Here’s how:
Click the Default search layout drop-down menu.
Choose the layout you want from the list. (To learn about creating custom layouts, read the save a layout article).
Sometimes a search brings back the contact records you need, but they’re not displayed in a useful order. A custom sort lets you specify sort order (and even allows multi-tiered sorting), so your search results are easier to work with.By default, Broadstripes will sort records alphabetically by first name, but from the General settings page you can specify a new default sort. After it’s chosen, the default sort will be applied to search results any time your users run a search (unless they’ve specified another sort order). Here’s how:
Click the Modify default sort button to open the sort editor dialog.
The default sort editor dialog will open.
Build your sort order:
Click + Add a criterion to add a field to the sort.
Drag and drop criteria using the grip handle to change priority, or use the up/down arrow buttons.
Click the sort-direction button on any criterion to toggle between ascending and descending order.
Click the X button to remove a criterion. At least one criterion is required.
Click Save in the dialog to apply the new default sort.
Choose the contact type you would like to apply to your field users (learn more about field users in the user role section of the user and membership overview.)
The turf panel is a page that shows users a summary view of the shops they are responsible for organizing by their location. The turf panel is viewable on the Turf tab of a user’s Project members page.From the General settings page, you can opt to add an additional column to all users’ turf panels to display more information about the people they organize.
To start, click the Additional column in turf panel drop-down menu.
Choose from one of the given options:
None (hidden) will leave the turf panel as it is, with no additional column.
Uncovered calculates and displays how many workers in each shop or department are not counted as covered under your project’s leader role coverage settings. A worker is uncovered if they do not hold a leader role that counts them as covered, and they are not following a leader whose role covers followers. Click the button in the Uncovered column header to see which of your project’s leader roles affect this count.
Unassigned calculates and displays how many workers in each shop or department have no leader assigned. Click the button in the Unassigned column header for a brief explanation of what counts.
After you’ve chosen this setting, users will automatically see the new column in the turf panel on their Turf tab. Each cell displays the count of workers meeting the condition as a large number, with the percentage of that shop’s total workers shown below it. Clicking the count opens a list of all the individual contacts.
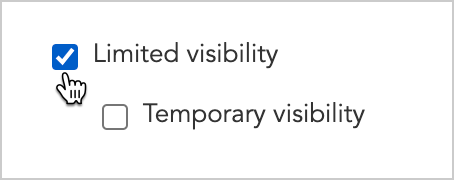
Sometimes an organizing team will include activists or volunteers who aren’t well-known to the team’s leadership or who, for other reasons, simply shouldn’t have full access to the project’s data.When this is the case, you can enable the “Limited visibility” toggle to turn on this feature in your project. (If you’d like to use limited visibility in your project, but don’t see it in your general settings, contact Broadstripes support to have it activated for the project.)When this feature is on, project admins can still see all the records in the project, but basic users can only see the people and organizations that are made “visible” to them. If limited visibility is not on, all basic users in the project will be able to view all people and organizations.Keep in mind that limited visibility is enabled on a project-by-project basis (if you have multiple projects, you can have limited visibility activated in some projects but leave it inactive in others.)If you enable the “Limited visibility” feature in your project, you will also need to take additional steps to define which shops or departments a basic user can see. The shops and departments you’ve assigned will appear in a list in the “Visibility” column of the member’s row on the Members page. Learn all about defining what a user can see in the Limited Visibility article.
Data imports bypass limited visibility. If any basic users already have the Can perform data imports permission when you enable limited visibility, Broadstripes will show you a warning listing those users before applying the change. You can choose to remove the data import permission from all of them at that time, or keep it and accept the risk that those users will be able to create and update records outside their visible scope.
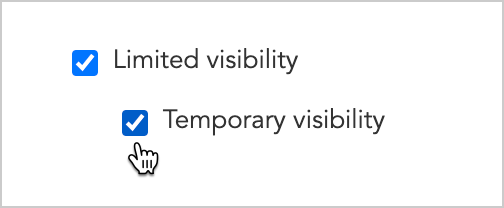
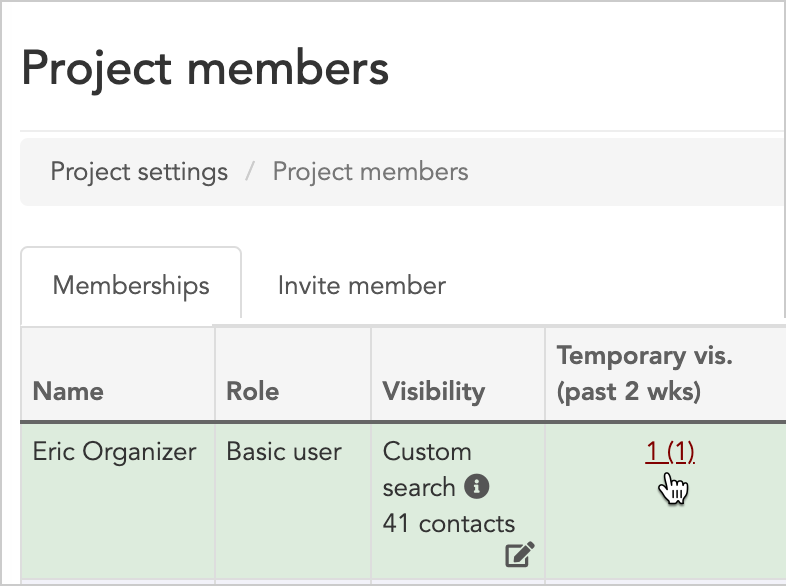
If you’ve enabled limited visibility in your project, you’ll also have the option of enabling “Temporary visibility.”Temporary visibility allows a basic user to search for a person who was not specifically made visible to them, and then click to view that person’s full record.The system will allow the user to temporarily view the entire record with no restrictions for the duration of their login session. Broadstripes will also log the request on the Member index page.As admin, you can view these requests for temporary visibility under Settings > Project members. Read step-by-step instructions on how to view the log of temporary requests in the Temporary Visibility article.If you don’t want to give basic users the ability to see records not specifically made visible to them, simply leave the “Temporary visibility” toggle off.
The majority of Broadstripes users are categorized asbasic users, and with general settings, you can control a few important permissions for them. You can learn more about different types of users in theUser and Membership Overview article.
Create people enable this toggle to allow basic users to add new person records to the project. When off, the “Create new person” link is hidden from the sidebar and mobile app for basic users, and any direct attempt to submit a new person record is blocked. This setting is enabled by default.
Create organizations enable this toggle to allow basic users to add new organization (shop or department) records to the project. When off, the “Create new organization” link is hidden from the sidebar for basic users, and direct submission is blocked. This setting is enabled by default.
Delete contacts enable this toggle to allow users the power to permanently delete contacts records from your project. Note that once a contact is deleted, it cannot be undone.
Manage quick links enable this toggle if you want to allow users to create a quick link on the Quick link tab of their Homepage. As an administrator, you can set up users’ quick links for them whether or not this is on.
Save and delete shared objects enable this toggle to allow basic users to share saved searches, layouts, and sorts with the whole project, and to rename or delete the shared ones they created. When off, basic users can still use shared objects created by others but cannot share new ones or modify existing shared ones. This setting is enabled by default.
Modify a record’s contact type enable this toggle to allow users to modify the contact type of a record.
See the change history viewer enable this toggle to allow users to view the change history viewer on the Recent changes tab instead of a basic view.
See changes to records outside their visibility made by users in their visibility
Different organizations use different language for talking about their work. Language settings let you specify how you want certain key fields to be labeled in your project.
Use “Assessment” instead of “Code” Broadstripes allows you to assign each worker a numeric level of support for organizing (usually 1-5). Enable this toggle if you prefer your project to use the label “Assessment” instead of “Code” wherever a worker’s level of support is shown.
Use “Job Title” instead of “Classification” Broadstripes lets you record any worker’s employment within a tiered structure. Commonly, the upper tiers are labeled “Employer, Department, and Subdepartment,” and the lowest tier can be labeled either “Job Title” or “Classification” depending on your choice here.